
Creating / Modifying a Ticket
This article explains how to create and modify Tickets. For additional information relating to management and reporting for Tickets, please see the CommTrak Support Centre Tickets section.
Tickets can be created by a CommTrak user or by a Customer:
Ticket Creation by CommTrak User
A CommTrak user can create a Ticket by pressing the New Ticket button on the:
- Active Tickets screen
- Tickets tab on a Customer screen
Tickets can also be created by pressing the + icon on the Active Tickets Summary Panel on the CommTrak home screen.
Ticket Creation by Customer
Customers can create Tickets:
- via the Customer Portal
- by sending an email to a designated tickets-from-emails address
Ticket Creation by CommTrak User
When the New Ticket button is pressed, the following fields will be displayed:
Template
This field is displayed only if Ticket Templates have been configured.
Select a template for auto-completion of Ticket fields.
For Template Ticket configuration, please refer to the following article:
Subject (mandatory)
The subject of the Ticket; this should be a brief description of the issue.
Description (mandatory)
This is a text-area into which a detailed description of the Ticket can be entered.
SLA Info
A Service Level Agreement can be specified for the Ticket.
For an SLA to appear in this drop-down list, the SLA must already be assigned to the customer; see the SLA section in the Customer Screen article.
Priority
Select the priority of the Ticket from the drop-down list. The options are:
- Critical
- High
- Normal
- Low
The default priority is Normal.
Ticket Type
The type of incident for which this Ticket is being created should be selected from the drop-down list.
The Ticket Type can be refined by selecting a Subtype (if available) from below the main Ticket Type in the drop-down list.
For configuration, see Support Centre article Ticket Types (Settings).
Department / Staff
The CommTrak user or Department to which this Ticket should be allocated.
Either an individual CommTrak user or a Ticket Department can be selected from this drop-down list. If a Department is selected, Ticket notifications (if any) will be sent to all Department members as listed under the name of the Department in the drop-down list.
For configuration, see Support Centre article Ticket Types (Settings).
Customer Name
The name of the Customer.
This field is a company name search; enter a minimum of three consecutive characters from the company name to display a list of matching records.
If the Add Ticket button in a Customer's Tickets tab is used to add the Ticket, the Customer Name field is populated automatically.
Email Account
Select the email configuration with which this Ticket should be associated. The selected configuration will determine the email account that will be used for Ticket notifications to the Customer, and for receiving subsequent Customer email responses for the Ticket.
If no email configuration is selected, then the Ticket is saved, the first email configuration in the drop-down list will be selected automatically. I.e. It is mandatory for a Ticket to be associated with an email configuration.
If there are no email accounts configured in CommTrak, a fallback email address will be used for sending email notifications to the Customer. Your organisation's CommTrak Administrator should refer to the Tickets-From-Emails (Settings) and Tickets Miscellaneous (Settings) articles for more information relating to the Tickets module email configuration.
Email Customer (visible only if a Customer Name has been specified)
If ticked, the Customer will receive a Ticket notification email when the Ticket is created.
The default selection for this field can be modified in Settings > Ticket Settings > Miscellaneous.
The Email Customer field is only displayed here when a Ticket is first being created. Once the Ticket has been saved, this field is moved to the More Info section, and is disabled, as selection is only relevant at the time the Ticket is created.
Contact (mandatory and visible only if a Customer Name has been specified)
The name of the Customer contact for this Ticket; the following options are available in the drop-down list:
- Add new contact
- Customer Email (selects the email address from the Customer's Main Info screen).
- Customer Contacts (lists the name and email address off all the Customer's contacts).
If the Add new contact option is selected, a pop-up window will be displayed enabling the user to enter the contact's details. Please see Customer Contacts for further information relating to adding Contacts.
Deadline
If required, specify a deadline time and date for the Ticket.
When a Ticket deadline has been breached, the Ticket details will appear in red text in the Active Tickets list.
Activity / Time Spent (visible only if a Customer Name has been specified)
When a Ticket is first created, chargeable or non-chargeable time can be added to the Ticket without adding a note. Please see the New Note, Activity section below for further details.
Timer
Start, pause or stop a timer for this ticket.

See the article Productivity Timers for further information about this feature.
Time Totals
This read-only field displays:
- cumulative durations for each Chargeable and Non Chargeable time added to the Ticket via notes
- percentage of time verified by Accounts Department
Tickets are marked as Verified by the Accounts Department, using the Productivity Report.
More Info
Immediately below the fields listed above is a grey expandable area bar with a downwards-pointing arrow.
Pressing the grey bar displays the More Info section:

The fields displayed in the More Info section depend on whether a new ticket is being created or an existing ticket is being modified.
For detailed information about the fields in this section, please refer to the Ticket - More Info article.
Action Buttons
- Add creates the Ticket.
- Cancel this Ticket
Once a Ticket has been created, it can be updated as required. Please see the section Viewing or Updating a Ticket below.
Ticket Creation by Customer
Via the Customer Portal
Authorised CommTrak Contacts can create Tickets in the Customer Portal.
By Email
CommTrak can be configured to receive support Tickets via predefined email addresses.
When a Ticket is created from an incoming email, it is automatically assigned to the appropriate Department / Staff, and is allocated the appropriate Ticket Type, depending upon the email address to which the Ticket is sent.
If the email address of the sender is recognised as a Customer or Contact email address, the Ticket will also be allocated to the appropriate company.
The subject and body of the email are assigned to the Subject and Description fields of the Ticket, respectively.
For configuration, see Support Centre article Tickets From Emails (Settings).
Once a Ticket has been created, it can be updated as required.
If the Ticket was created via Tickets-From-Emails, and an SLA is assigned to the Tickets-From-Emails address, the SLA will be automatically applied to the Ticket only if that Customer has the SLA allocated to them on their Customer Screen.
Viewing or Updating a Ticket
CommTrak Tickets can be viewed or updated by pressing on the Ticket row in the Active Tickets screen.
For information about additional features available when viewing a Ticket, see Support Centre article Viewing a Ticket.
Tickets are opened in a separate pop-up browser window, which contains two sections:
Ticket Details Section
The Ticket details section is headed with an information bar containing the following details:
- Ticket ID
- Customer name (if available)
The Ticket details section contains the following fields:
Date Added (read-only)
The date and time the Ticket was created.
Seen By (read-only link)
A numeric count of the number of staff who have viewed this Ticket.
Pressing the Seen By link will open a read-only pop-up window containing a list of staff who have viewed this Ticket, together with the date and time on which they first viewed the Ticket.
Subject (mandatory)
Description (mandatory)

Depending on the user's permissions, and the source of the ticker (i.e. manually created or emailed), various icons will be displayed in the top-right of the Description field (as shown in the previous image):
Ignore Sender (person icon) - enables the user to block the sender of the email for a specified period. This icon is only visible for users with the required permissions, and if the ticket was created automatically using the Tickets-From-Emails feature. See Support Centre articles Ticket Ignored Senders (Settings) and Ticket-From-Email (Settings) for information relating to use and configuration of these features.
Customer Email Preview (magnifier icon) - displays the customer's original email in a pop-up window. The preview includes formatting and images from the original email.
Forward Original Customer Email (envelope icon) - sends a copy of the sender's original email to the currently-signed-in user's mailbox. This enables the user to see the message in its original format, and is useful if the sender embedded images or documents in the email, or formatted the message in a particular style that is required to interpret the Ticket correctly. This icon is only visible if the Ticket was created automatically using the Tickets-From-Emails feature.
Modify Description (pencil icon) - if the description is editable, the pencil icon is displayed (visible in the following image). Pressing the icon activates the rich text editor, so the content can be modified.

Related and Upload Documents
Customer documents that are relevant to the Ticket are displayed in this field.
This field is only visible when the Ticket is associated with a Customer. If the Related and Upload Documents field is not visible, you must assign the Ticket to a Customer and press the Save button, after which the field will be displayed.

See the Support Centre article Related and Upload Documents for further information about this feature.
SLA Info
If the Customer has one or more Service Level Agreements (SLA) assigned on their Customer Screen, an SLA can be selected if required.
When an SLA is applied to a Ticket, the Expected First Response and Expected Closure dates/times are displayed:

Attachments
A list of email attachments.
This field is only displayed if the Ticket was created automatically using the Tickets-From-Emails feature, and if the sender's original email contains email attachments (such as screenshots, PDF documents, etc):

Pressing the Save (floppy disk) icon presents the Save Document pop-up window, which enables the user to save the attachment into the Customer's Documents.
Pressing the filename will either display the attachment in a new browser tab (if the browser can display the file-type), or the document will be downloaded by the browser for viewing with the appropriate application (e.g. Word, Excel).
The attachment file names appear exactly as designated in the original email.
Related To
A Ticket can be related to a Lead, Workflow, Job and Project; see Support Centre article Related Records for further information about this feature.
Order Summary
Pressing the Order Summary Information (i) icon opens a pop-up Order Summary window containing key information about the related Lead.
Order Summary information is available only when a Lead is related to the Ticket.
Priority
Select the priority of the Ticket from the drop-down list. The options are:
- Critical
- High
- Normal
- Low
The default priority is Normal.
Pressing the History (clock) icon, located to the right of this field, displays a pop-up window which lists the history of changes to the Ticket priority.
Ticket Type / Subtype
The type of incident allocated to this Ticket can be modified by selecting the required Ticket Type from the drop-down list.
If specified in Settings, a Ticket Subtype can also be selected from this list.
See Support Centre article Ticket Types (Settings) for configuration.
Department / Staff
The CommTrak user or Department to which this Ticket has been assigned, can be modified using this drop-down list. If a Department is selected, Ticket notifications (if any) will be sent to all Department members, as listed under the name of the Department in the drop-down list.
See Support Centre article Ticket Departments (Settings) for configuration.
Customer Name (link)
The Customer to which this Ticket is allocated. The Ticket can be reallocated to another Customer by pressing the Modify (pencil) icon.
Pressing the Customer Name link opens the main company record in the master browser window (i.e. the browser window from which the Ticket was opened).
Email Account
The Email Account...
Contact
The name of the Contact person for the Customer can be modified using this field. Either select the name of an existing Customer Contact, or select Add new contact to provide details of a new Contact.
The details for the currently-selected Contact can be changed by pressing the Modify (pencil) icon.
More information about Contact records is available in the Support Centre article Customer Contacts.
Deadline
A date and time can be set for a deadline for closure of the Ticket. The deadline time / date are displayed on the Active Tickets screen.
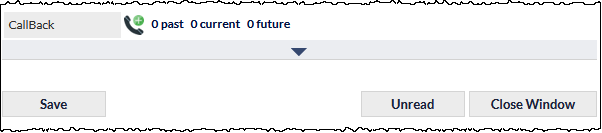
CallBack
Reminder notifications for this Ticket can be created using this feature. Please see the Support Centre article CallBacks for further information.
Hidden Fields
Instigator (read-only)
The name of the staff member who instigated this Ticket.
This field will be blank if the Ticket was created via the Tickets-From-Emails feature, as there is no instigator for such Tickets.
Email Customer (read only)
If the Customer was emailed at the time the Ticket was manually created, this box will be ticked.
When viewing an existing Ticket, this field will be visible but disabled (greyed-out), as this option is only relevant at the time the Ticket is created.
Inventory
Reserve (or modify reservation) or Dispatch Inventory items from this Ticket. This field displays a list of inventory items (if any) that have been reserved for this Ticket. Pressing the pop-out icon presents the Dispatch / reserve inventory items window.
Data Sheets
Data Sheets can be added to a Ticket.

Links to related Data Sheets are displayed immediately below the drop-down list, and pressing the name of the Data Sheet opens it in a separate browser window for viewing or editing.
To delete a related Data Sheet, press the adjacent Trash Can icon.
Hold Until
An active Ticket can be placed on hold by specifying a Hold Until date.
Active Tickets that have been placed on hold will automatically have on-hold removed when the on-hold date is reached, or when the on-hold date is manually cleared by pressing the Clear the date field icon located to the right of the Hold Until field (see Support Centre article Date Selection for calendar icon descriptions).
On-hold Tickets are not displayed on the Active Tickets list (as accessed from the Tickets option in the CommTrak Main Menu).
On-hold Tickets are always visible in the customer's Ticket tab.
When a Ticket is on hold, the Hold-Until field is no longer hidden:

Ticket notifications remain active for Tickets that are on hold, so designated staff will still receive related email notifications.
Reporting on Hold Until
To report on held Tickets, in the Tickets Reports, select the Currently on hold criterion, which will restrict the results to include only Tickets that are currently on hold:

Action Buttons
- Save any changes to the ticket
Updates to the New Note section are not affected by pressing the Save button; please see New Note, below.
- Unread - Tickets that have not been viewed by the currently logged-in user are displayed in the Active Ticket lists in bold text; pressing the Unread button resets the read status of a Ticket.
- Close Window - Closes the Ticket window.
New Note
The New Note section of the Ticket window enables the user to add notes and other details to a Ticket:
Status
If the status of this Ticket is to be updated, select the new status of the Ticket.
Contact
IMPORTANT: Selecting the Email Customer option will result in a copy of the note being emailed to the Customer Contact. Specifying one or more email addresses in the Other Email field will result in emails being sent to the specified email address(es).
The Contact section contains four fields:
- Email Customer - the Customer Contact selected in the Ticket Details section will receive a Ticket update email notification that contains the note and Ticket details.
- Other Email - sends an email notification relating to the Ticket Note to one or more arbitrary email addresses; this option is ticked automatically when the Other Email textbox is selected. Enter one or more email addresses, either by selecting from the drop-down list of customer contacts / staff that is presented, or by manually typing an email address.
For each email address added to the Other Email field, the Ticket note will be sent to that email address as an email 'To'; i.e. the note is not cc'd. Other Email recipients will not be aware that the note has been sent to other recipients unless advised in the body of the note.
Important; please refer to the Support Centre article Entering Email Addresses to understand how to confirm manually-entered email addresses.
- Include Email History - (visible only if Email Customer is ticked) if a Ticket update email notification is sent (i.e. Email Customer and / or Other Email are selected), it will include the history of all previous email communications (incoming and outgoing) relating to this email.
A note's content is only displayed in the history section of a recipient's Ticket notification email if the note had been sent via email to any external (i.e. non-staff) email address; all other notes are excluded from the history section of the notification email.
Each user's Include Email History setting is retained. For example, if you ticked this field last time you emailed a Ticket note to a customer, it will be ticked next time you tick Email Customer, and vice versa.
- Called Customer - indicates that the Customer Contact was spoken to in relation to this new note.
Autoclose
The Ticket can be set to automatically close by selecting an option from the Autoclose drop-down list, which provides the following options: Never, After 1 day, After 2 days... After 7 days:

The Autoclose duration is relative to the time at which the Ticket note was added; i.e. if the Autoclose note was added at 08:45 am, and the duration is set to After 2 days, the Ticket will be closed at 08:45 am, two weekdays after the note was added.
The Autoclose feature is automatically cancelled in the event that any additional notes are added to the Ticket, either manually, or via a Customer's response to a Ticket email.
If an Autoclose period is specified, an additional field is displayed:
Notify Customer (default Yes)
If ticked, then at the time a Ticket is automatically closed, the Customer will receive an email notifying them that the Ticket closure has occurred.
The Customer's Autoclose notification email will always contain the Ticket Description and Subject fields, regardless of how the Ticket was created (i.e. manually or via Tickets-From-Emails). For this reason, it is important to ensure that these fields never contain content that is not intended for the Customer's eyes. Information that is sensitive should only be entered into the Ticket Notes field, as this field is only ever disclosed if the note was sent to an email address.
Staff
The name of the CommTrak user who is entering the note and to whom any productivity activities will be assigned (see the next field, Activity / Time Spent, for additional information).
The default is the currently logged-in user.
Activity / Time Spent
To add chargeable or non-chargeable time to a Ticket, select the activity and duration using these fields.
Refer to Productivity Activities - Adding Productivity to a Note, for detailed information about use of this feature.
Timer
Start, pause or stop a timer for this ticket.
See the article Productivity Timers for further information about this feature.
Time Totals
This read-only field displays:
- cumulative durations for each of Chargeable and Non Chargeable time added to the Ticket via notes
- percentage of time verified by Accounts Department
Tickets are marked as Verified by the Accounts Department, using the Productivity Report (Reports > Productivity Report).
Attachments
This field is used to attach one or more files to a Ticket note. If the note is being emailed to a Contact, the file(s) will be attached to the outgoing email notification.
Files can be attached to the note using one of the following methods:
- Drag and drop one or more files onto the Choose Files button in the Ticket note section.
- If multiple attachments are required, drag and drop them in a single action.
- If multiple files are dragged and dropped individually, only the last file will be retained.
- Press the Choose Files button and select the file(s) to be attached.
- If a single file is selected for attachment, the filename will be displayed to the right of the field.
- If multiple files are selected, a count of the number of files will be displayed (e.g. 3 files).
If the note is emailed to a Contact, attached files will appear to recipients as email attachments within their email client (e.g. Microsoft Outlook).
Canned Response
This drop-down contains a list of predefined responses that, when selected, will automatically populate the Ticket Note field with the specified text.
The predefined responses can include placeholders, such as the Contact name and the currently logged-in user's name.
Once selected, the canned response can be modified as required prior to adding the note.
Any text that has already been entered into the Ticket Note (either manually or via a canned response) will be replaced if a canned response is selected.
For configuration, see Support Centre article Ticket Canned Responses (Settings).
New Note
Enter the detail of the new note into this field. If the new note is to be sent to the Customer as a Ticket update email notification, the text of the new note will be included in the body of the recipient's email.
Ticket notes can be formatted using the available tools:
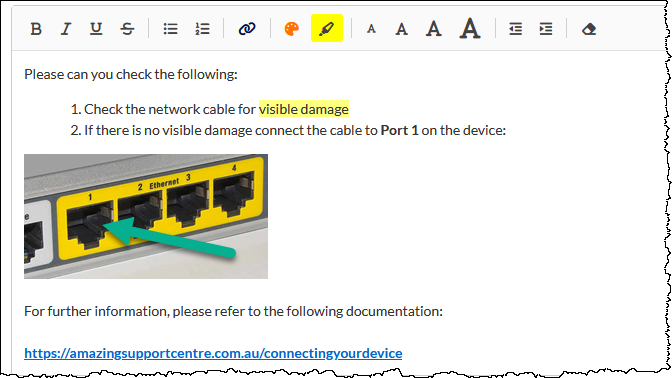
Images can be pasted into the ticket note. We strongly recommend ensuring that images are compressed, to reduce storage requirements, and to reduce the size of the email sent to the recipient.
The New note field must be populated with some text if any other field in the New Note section has been modified (i.e. if a new note is being added).
The Productivity Activity Autofill feature can been enabled in General Miscellaneous Settings:
If a note is not being emailed (i.e. no email options have been selected for the note), and the note field is empty and the Activity and Time Spent fields have been populated, the New note text will automatically be populated with the name of the selected Activity. The autofill text is added when the Save button is pressed.
Editing a Previous Note
Previous notes can only be edited under the following conditions:
- User must have permission to edit notes
- Note must not have been sent as an email
- Note has no chargeable or non-chargeable time allocated
To modify a previous note, press the edit (pencil) icon, displayed to the right of the note header (visible in the following image):

The Modify ticket note pop-out window is displayed, and the note can be edited:

When the modified note is saved, details of the date / time and user who edited the note is appended:

Only the details of the most recent edit are retained. i.e. if the same note is later edited, only the date / time and user name for the most recent edit are displayed.
Action Buttons
- Press the Add button to add the New Note details to the Ticket, and update the other fields (e.g. Status) in the New Note section, as appropriate.
Pressing Add will also confirm any unsaved fields in the main Ticket section of the window. For example, if the Department field has been modified, the changes will be saved when the Add note button is pressed.
If any of the New Note email options have been selected, a Ticket update email notification will immediately be sent to the selected recipients; no confirmation is requested.
To discard an unsaved note, click the Close Window button at the bottom of the Ticket window before clicking Add. Note: This will close the window and your note will not be saved.
Currently Opened Tickets
The currently-opened-Tickets (i.e. Ticket is being viewed) feature can assist in avoiding a situation whereby two CommTrak users attempt to update the same Ticket simultaneously, thus duplicating work.
If another CommTrak user is currently viewing a Ticket, this is indicated in the Active Tickets list by the display of the Currently opened by... (eyeball) icon, which will be located next to the more info (i) icon to the left of the Ticket item:

Hovering the mouse pointer over the Currently opened by... (eyeball) icon displays a pop-up notification advising the name of the CommTrak user who is currently viewing the Ticket, and the time that they started viewing the Ticket.
If the Ticket is viewed when currently opened for viewing by another CommTrak user, the Ticket will be displayed, which is the normal behaviour; however, the Ticket is being modified pop-up window will be displayed, showing the name of the other CommTrak user, along with a Release link. If the Release link is pressed, the Ticket will no longer be marked as being viewed by the other CommTrak user.

To continue viewing the Ticket without releasing it from being viewed by another CommTrak user, press the red X icon located at the top-right of the Ticket is being modified window.
The Release feature is provided so the opened-for-viewing note can be relinquished if the other CommTrak user is known not to be viewing the Ticket. Occasionally, a Ticket can incorrectly be identified as being opened-for-viewing; this can occur, for example, if a Ticket was being viewed on a mobile device, and the Ticket browser window was not closed correctly. Releasing a Ticket does not delete or cancel any information that is being entered by the other CommTrak user; however, under these circumstances, two CommTrak users may simultaneously attempt to update the Ticket details, in which case the information recorded in the main Ticket details section will be that provided by the last user to press Save. Any notes that were added by either party will be displayed in the chronological order in which they were added.
In any case, a Ticket is always marked as no-longer being viewed 48 hours after it was opened for viewing. This prevents cases where the eyeball icon would otherwise be displayed indefinitely.
Closing a Ticket
A Ticket is no longer active when it has one of the following statuses:
- Closed
- Cancelled
The Closed status is typically specified when a Ticket is successfully resolved or requires no further action.
The Cancelled status is typically selected when a Ticket was created unintentionally, or when it is a duplicate of an existing Ticket.
Closing or cancelling a Ticket will remove it from the Active Tickets list. To view a non-active Ticket, either locate it and select it in the Previous Tickets section of the customer's Tickets screen, or use the Ticket searching features located on the CommTrak Search Dashboard, Tickets screen or Customer Tickets screen.
For further information about Ticket statuses, please see the below Ticket Statuses section.
Ticket Statuses
CommTrak has some predefined Ticket statuses which cannot be modified, however, additional custom Ticket statuses can be created if required.
Predefined Statuses
The predefined statuses, together with a description of their intended purpose, are detailed below:
- Open - the Ticket is currently active and requires action
- Convert to job - a new Job will be created and, by default, the Ticket will be closed
- Convert to lead - a new Lead will be created and, by default, the Ticket will be closed
- Convert to workflow - a new Workflow will be created and, by default, the Ticket will be closed
- Cancelled - the Ticket is unnecessary (e.g. a manually-created duplicate) and no longer required
- Closed - the Ticket requires no further action (typically a successfully resolved issue)
Convert To...
When any of the Convert to... options are selected, the (previously-hidden) Close Ticket tick-box is shown with a tick in it. When the note is added, the Ticket will be closed automatically, and the new Job, Lead or Workflow screen will be presented.
The tick can be removed from the Close Ticket tick-box if the Ticket is to remain active.
Please refer to article Convert Ticket To for additional information about this feature.
Related To
When a Ticket is converted to a Job, a Lead, or a Workflow, a reciprocal Related To link is created in the Ticket, and in the Job, Lead, or Workflow. Please see the Related Records article in the Common Features category of the Support Centre for further information.
Custom statuses
Additional Ticket statuses may be created. Examples of custom statuses are:
- Customer to confirm - awaiting a customer response
- Being managed - the Ticket has been seen and actioned
When a custom status is selected, there is no effect on the behaviour of the Ticket; i.e. the Ticket remains active.
For configuration, see Support Centre article Ticket Statuses (Settings); predefined statuses cannot be deleted or modified.
Ticket Email Notifications
Internal Ticket notifications can be sent to the relevant CommTrak users upon the creation of a new Ticket, and when existing Tickets are updated.
The details of the default internal Ticket notifications are provided below; however, please note that the notification email templates can be modified in Settings > General Settings > Email Notifications.
For more information, see Support Centre article Ticket Email Notifications.
Direct Link
Internal Ticket notifications contain a Direct Link which, when pressed, will open a browser window displaying a summary of the ticket information. Pressing the summary will open the ticket in a separate pop-up browser window.
If the user is not currently logged-in, the CommTrak login screen will be presented in the browser window.