
Viewing a Ticket
This article explains how to view a Ticket, and provides information about some of the key features that are useful when viewing a Ticket.
For detailed information about creating or modifying a Ticket, including a detailed explanation of all Ticket fields and features, see the Support Centre article Creating / Modifying a Ticket.
CommTrak Tickets can be accessed from several locations, including:
- CommTrak Search Dashboard results
- Tickets Summary Panel
- Active Tickets Screen
- Customer Tickets Screen
Clicking on a Ticket item in any of the above screens will open the selected Ticket in a separate browser tab or in the current browser tab depending on the context of the Ticket item:

As shown in the previous image, the Ticket window is separated into three sections:
- Ticket Information
- New Note
- All Notes
The fields in the above sections are detailed in the Support Centre article Creating / Modifying a Ticket; however, features that are particularly useful when viewing a Ticket are detailed below:
Ticket Information
The section header contains the name of the company to which the Ticket has been assigned (if any) and the unique Ticket ID.
Editing Subject and Description fields
The Subject and Description fields can be edited by clicking the pencil icon in the top-right of those fields:

Press Save in the Ticket information section to confirm changes that have been made to the Subject or Description fields.
Viewing Original Email Message
If the Ticket was created via Tickets From Emails, the Description field displays only the plain-text of the received message. The original email (from which the Ticket was created) can be viewed by clicking the envelope icon, displayed in the top-right of the Description field (see previous image). The original email will be forwarded to the email address of the currently signed-in user, in the exact format in which it was received from the sender (including formatting, images, attachments, etc.). CommTrak forwards the email immediately.
This feature is useful if the sender has used formatting within the email which helps provide context for the message and is not visible in the plain-text presentation of the Description field.
Viewing Attachments
If the Ticket was created via Tickets From Emails, all attachments and images are extracted from the original email and can be accessed from within the Ticket. The attachments section is visible at the lower-left of the Ticket information section, as highlighted in the following image:

It is common for image attachments to be presented with generic names such as image003.png (as shown above). Images with generic names are typically those which have been used in the sender's email signature and other unnamed images that are contained within the original email.
Viewing / Saving Attachments
Clicking on the name of the attachment (such as ticket_screenshot.png above) will, if possible, display the document in a new tab in the main CommTrak browser window. If the document cannot be displayed by the browser, it will be downloaded to your device using your browser's download feature.
Saving Attachments to Customer's Document Library
To save an attachment to a folder in the Customer's Document Library, click the save (floppy disk) icon adjacent to the required attachment. The Save Document pop-up window will be displayed.
When a document is saved in the Customer's Document Library, it is automatically added to the Related document field...
Adding Related Documents
To add an existing Customer Document to the Related Documents, or to upload a new Customer Document, click the cloud icon (see the following image), to display the Related Documents pop-up window.
For more information about using the Related Documents feature, see Support Centre article Related and Upload Documents.
Related and Upload Documents
This field is only visible when a Ticket has been associated with a Customer and saved, at which time the field will be displayed).

The Related and Upload Documents feature assists CommTrak users in quickly specifying and identifying documents that are relevant to the current Ticket, rather than needing to access the customer's Documents tab and locating associated documents.
See the Support Centre article Related and Upload Documents for further information about this feature.
Hidden Fields
Some less-frequently-used fields are hidden in the expandable area:

For more information about hidden fields, please refer to Support Centre article Creating / Modifying a Ticket.
New Note
New notes are added to a Ticket in this section. See Support Centre article Creating / Modifying a Ticket for more information about adding a Note to a Ticket.
All Notes
All notes, including notes that have been added via a customer's email response, are listed in this section.
The main features in this section are documented in Support Centre article Creating / Modifying a Ticket, but some features that are particularly useful when viewing a Ticket are detailed below:
Ticket Note Attachments
If a contact replies to a Ticket via email and the email contains attachments, they are shown in, and can be accessed from, the note:

Viewing / Saving Attachments to Device
Clicking on the name of the attachment will, if possible, display the attachment in a new tab in the main CommTrak browser window. If the attachment cannot be displayed by the browser, it will be downloaded to your device using your browser's download feature.
Saving Attachments to Customer's Document Library
To save a received attachment to a folder in the Customer's Document Library, click the save (floppy disk) icon adjacent to the required attachment. The Save Document pop-up window will be displayed.
Viewing Note Email Message
The original incoming email (from which the note was created) can be viewed by clicking the envelope icon in the bottom-left of the note area (see previous image). The email will be forwarded to the email address of the currently signed-in user, in the exact format in which it was received from the sender (including formatting, images, attachments, etc.). CommTrak forwards the email immediately.
Ticket Note ID / Links
Each Ticket Note is assigned a unique ID and a link (URL), which can be copied and shared with other CommTrak users within your organisation.
The unique Note ID is displayed in the header of each note, as highlighted in the following example image:

Pressing the copy link icon (adjacent to the Note ID, highlighted in the previous image) copies the Note's unique URL into your device's clipboard. The link can be shared, for example, via email or third-party messaging applications such as MS Teams, etc.
When using a Ticket Note URL (e.g. by clicking it when received in a third-party messaging application), the relevant Ticket will open in a new browser tab, and the linked note will be highlighted with a yellow border, as shown in the following image:

The highlighted border enables rediscovery of the linked note whilst scrolling through a long list of notes, as the linked note will remain highlighted until the browser tab / window is updated or closed.
Tab Context (Current or New Tab)
Tickets will open in either a new browser tab or the current browser tab, depending on the context of the current screen:
Active Tickets Screen
When viewing the Active Tickets screen (accessed via the main menu Tickets option), selecting a ticket will open it in a new tab.
This facilitates a convenient process for working with multiple tickets concurrently.
When you have finished working with a ticket, you can simply save any changes and close that ticket's browser tab.
Customer Ticket Tab
When selecting a ticket from within a customer record; for example, from the customer's Tickets tab, or the Related To field of a Lead, Workflow, etc, the ticket will open in the current browser tab.
The previous screen can easily be returned to by pressing the the relevant reciprocal link in the ticket's Related To field, as shown in the following image:

Projects
As with the Active Tickets screen, selecting a ticket within a Project will open the ticket in a new browser tab.
This design facilitates typical activity within Projects, enabling users to access and review tickets (and other components) efficiently.
Opening each ticket in a separate tab allows for streamlined navigation and task management, particularly in Projects that contain numerous components.
Standard browser keyboard shortcuts
Close the current tab:
- Windows: Ctrl+F4
- Mac: Cmd+W
Reopen the last closed tab (this can be repeated to open multiple tabs):
- Windows: Ctrl+Shift+T
- Mac: Cmd+Shift+T
For additional tab options:
- Right-click on any browser tab. The Close Multiple Tabs option is particularly useful!
Browser Tab Title
To enable easy identification of tickets when multiple tabs are open, the ticket ID and Company name are displayed in the tab title, as highlighted in the following image:
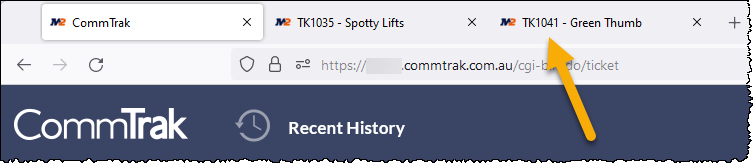
Note that this behaviour also applies to other components; for example, a workflow or lead ID will be displayed, along with the customer name.
When there are many tabs open, the browser's standard behaviour is to truncate the tab title but, typically, the component ID will still be visible. In addition, hovering the mouse cursor over the tab will display a tooltip containing the full tab title.
The exact behaviour will vary depending on which browsers is being used, browser-window size and the number of open tabs.