
What's New May 2025
General
Customer
Leads
CallTrak
Settings
Jobs
Reports
General
Notes Enhancements
Icons for notes have been enhanced to indicate the type of note.
Some examples are shown in the following images:
Leads
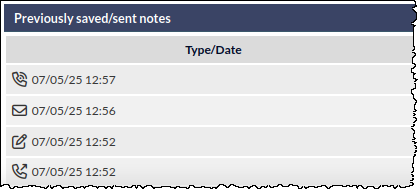
Customer Notes
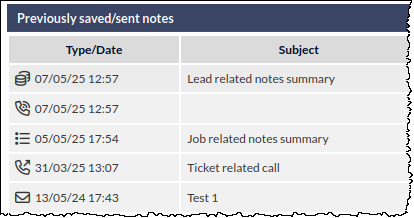
Projects
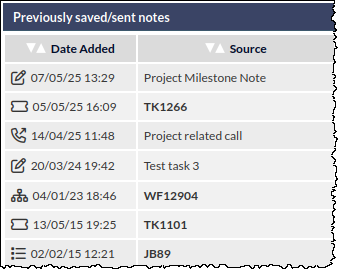
Please note that the above examples are not comprehensive, and provided as examples.
News Banner
The News Banner has a new look, and has been enhanced with several new and improved features:
New Look!
News headlines are displayed over the CommTrak Information Bar:

Multiple News Headlines
When there are multiple news items to display on the same day, the headlines are rotated at 5 second intervals.
Each article is represented by a dot, rightmost in the news banner:
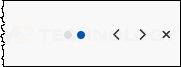
- Clicking a dot will display the associated news item
- Pressing the left / right chevron rotates through the news items
- Pressing the x icon, dismisses the news banner
The News Summary Panel displays active news items:
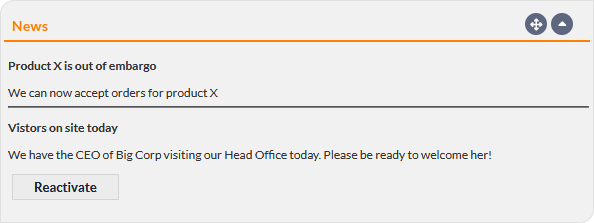
If the news banner has previously been dismissed, it can be reactivated by pressing the Reactivate button (visible in the previous image).
News Target Audience
When a news item is created, it can now be targeted to one of:
- Staff (CommTrak users)
- Portal Users (customers who have been provided with Portal access)
- Portal Partners (only available if you CommTrak has the Partner module enabled)
News items can be added and modified in Settings > General Settings > News.
Customer
Enhanced Customer Affiliation Visibility
We've made it much easier to see a customer's Affiliation.
When an affiliation is assigned, a coloured banner is now displayed immediately below the tabs on all customer screens, as shown in the following image:
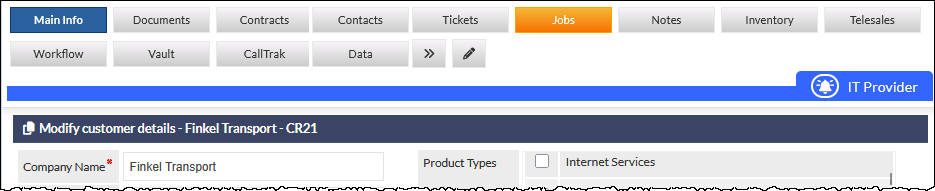
This banner stays visible as you scroll, so the customer's affiliation is always easy to identify.
As part of this change, field labels no longer use affiliation colours.
There are no changes to how affiliations are configured - the settings can still be found under Settings > Customer Settings > Affiliation.
Leads
Quote Item Percentage Markup enhancement
Following the release of the Quote Item Percent Markup feature in March 2025, a modification has been made to the behaviour of the markup calculation, if a Buy / Sale Price is subsequently modified (after saving the quote):
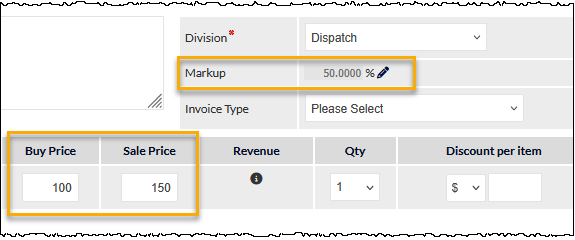
- When a Buy Price and Sale Price are entered into a new line item, the Markup is calculated automatically when the Save button is pressed.
In the following example image, a Buy Price of $100 and a Sale Price of $150 have been entered, and the Markup has been calculated automatically upon pressing Save:
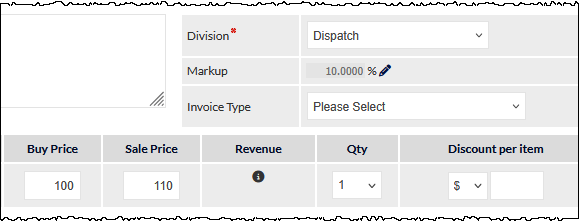
If either one of or both of the Buy Price or the Sale Price are subsequently modified, the Markup calculation will adjust automatically - the Buy Price and Sale Price will not be modified automatically, by default.
To demonstrate this, in the following image, only the Sale Price has been modified (to $110), and the Markup percentage (which is read-only by default) has adjusted accordingly (to 10%):
If we need to modify the Markup, we can do so by pressing the pencil icon, and this will change the Markup field to be editable.
We can now edit the Markup percentage, and this will update the Sale Price in real-time. In the following image, we have changed the Markup percentage to 100%, and the Sale Price has automatically updated accordingly, based on the Buy Price:
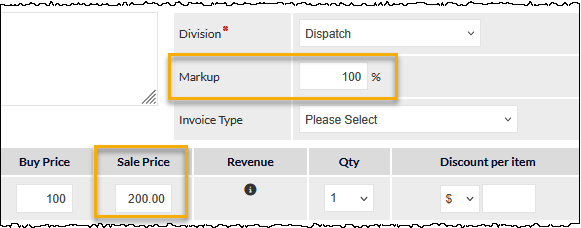
Whilst the Markup field is editable we can also modify the Buy Price, and this will cause Sale Price to be updated based on the new Buy Price and the current Markup percentage. Similarly, whilst the Markup field is editable we could modify the Sale Price, and this will cause Buy Price to be updated based on the new Sale Price and the current Markup percentage.
For more information please refer to the Support Centre article, Creating / Modifying a Quote.
CallTrak
Tracking Incoming / Outgoing Calls
Call tracking has been enhanced to include tracking incoming and outgoing calls in the following modules:
- Customer (Main Info tab)
- Leads
- Projects
- Tickets
- Jobs
- Workflow
In each of the above modules, a Calls field is displayed:
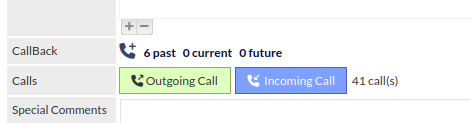
The Calls field has the following features:
- Outgoing Call - initiate and add a note for an outgoing call
- Incoming Call - add a note for an incoming call
- Call counter - running total of all calls
Pressing the Outgoing Call or Incoming Call buttons displays a pop-up Call Note window:
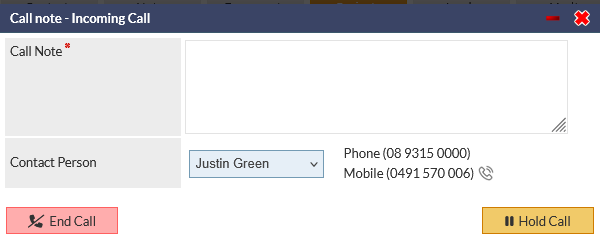
Selecting a Contact Person from the list of contacts displays the telephone numbers for the contact.
If call dialling is enabled in your CommTrak, a telephone icon is displayed next to the telephone number (visible adjacent to the mobile number in the previous image). Clicking the phone icon will initiate your call dialler.
Cancel the call
Press the red X icon (top-right in the previous image) to close the pop-up window without saving the call details.
End Call
Press the End Call button to save the call as a note - Call Note field is mandatory.
Hold Call
Press the Hold Call button to close the Call note pop-up window, but continue the call.
Pressing the red bar (minus) icon in the Call note pop-up window title (visible in the previous image) has the same effect as pressing the Hold Call button.
Holding a call enables you to navigate elsewhere in CommTrak, whilst subsequently being able to return to the Call note pop-up window. When a call is on hold, the telephone handset icon is displayed in the CommTrak Information Bar to indicate that a call is in progress:

Hovering over the handset icon displays a tooltip with the call details (not visible in the previous image).
Pressing the handset icon opens a new browser tab to display the component in which the call was initiated (e.g. Ticket, Job, Lead, etc), and the Call note pop-up window is displayed automatically.
When a call is on hold, the Calls field shows a Call in Progress button:

Pressing the Call in Progress button displays the Call note pop-up window.
Call Notes
All call notes are added as a note as appropriate for the module in which the call was made. For example, when adding call note from a Lead, a Lead note is added, when adding a call note from a Ticket, a Ticket note is added, etc.
Productivity Activity Timer in CallTrak Calls
When adding a call note within a Ticket or a Job, there is an option to Start Timer:
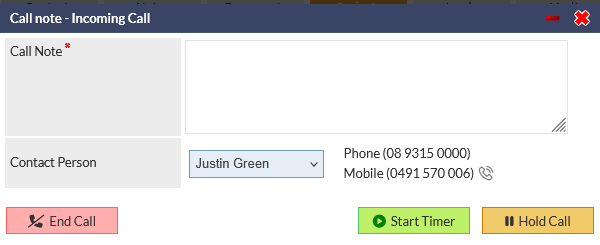
Pressing the Start Timer button initiates the Job / Ticket productivity timer. Please refer to Support Centre article Productivity Timers for more information about this feature.
Each user can choose whether the productivity timer starts automatically when a call begins, in My Details > Preferences. The default is that the timer must be started manually.
Call Note Reporting
CallTrak call notes can be reported on in the Customer Reports - see the section Customers Report - Last or No contact between Enhancements, in this article.
Settings
Productivity Timer Preferences
Users can set their own preference for starting of the activity timer when outgoing and incoming calls are initiated.
In the Preferences tab of each user's My Details, there is a new option:
- Start activity timer on Outgoing/Incoming calls
The default is No (productivity timers are not started automatically when a call is initiated).
Jobs
Schedule Enhancements
The Job Scheduler module has been updated with enhancements to provide easier navigation and reallocation of Jobs within the Schedule screen, in addition to several other enhancements, including utilisation of full screen-width in the Schedule views.
Day View, Calendar View and Settings have their own tabs:

Day View
Day view shows allocation of Technicians for the selected day (default today):
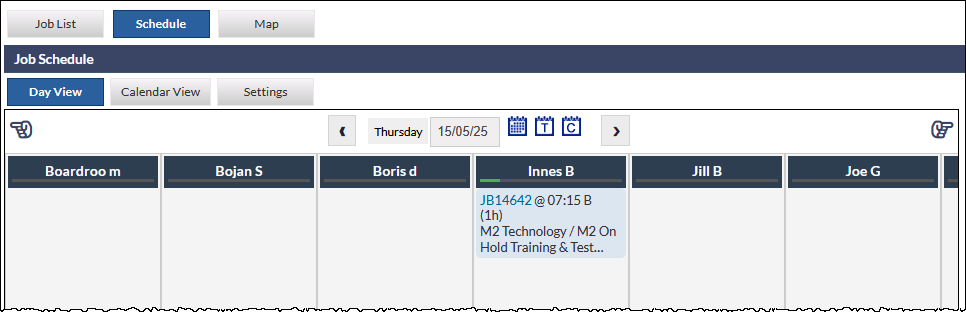
Unallocated Jobs are displayed in the rightmost column (not visible in the previous image).
Scrolling left / right in the schedule table can be achieved by either using the horizontal scroll wheel (or similar control, such as tablet touchpad, if your device has one), or by clicking one of the pointer icons located top-left and right of the schedule table (visible in the previous image).
Jobs can be allocated to a different technician by dragging the Job from its current column and dropping it in the column for a different Technician. The table will automatically scroll left / right as appropriate, if the Job is dragged towards the side of the schedule table:
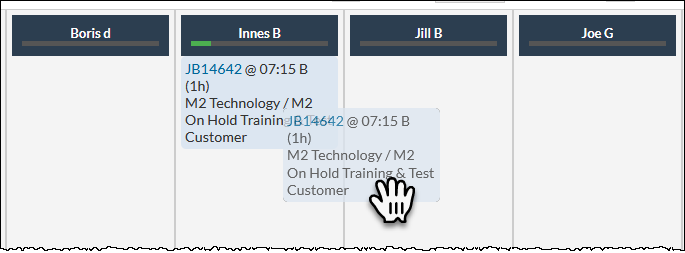
To change Job details other than the technician allocation, click on the Job's ID link to open the Job in a separate tab.
The total time allocated to a technician on the current day is represented by the green bar below the technician's name (visible in the previous image). The time allocation bar will adjust dynamically if a job is dropped into, or removed, from a technician's column.
Calendar View
Calendar View displays Jobs in a calendar.
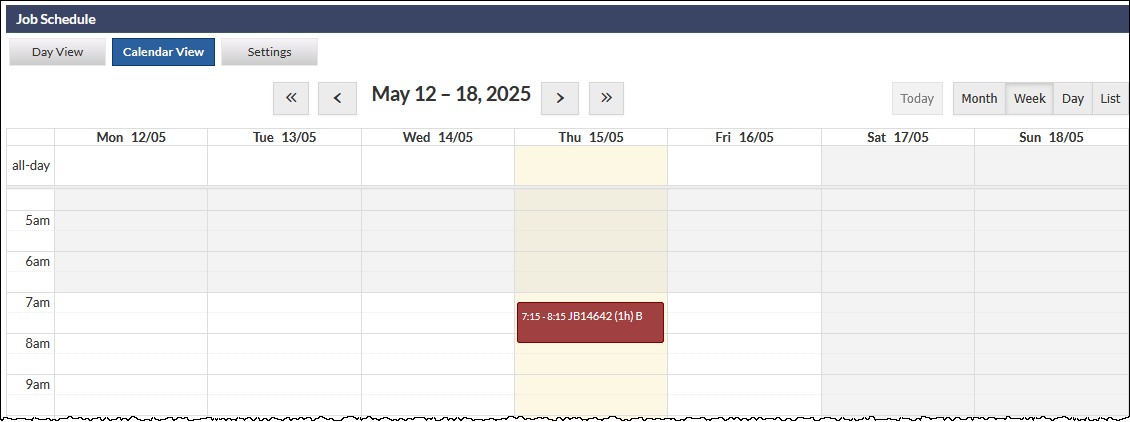
The default view is Week view, but the user's previous selection is remembered. For example, if the user last viewed the Day view, returning to the calendar will display the day view.
Clicking the Job opens the Job details in a new browser tab.
Hovering over a Job in a calendar view displays an information card:
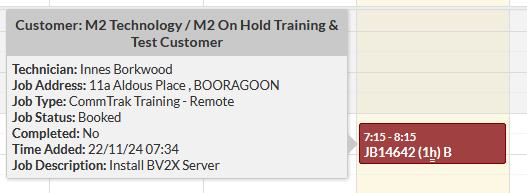
In the Day and Week views, when hovering over a job entry in the calendar, a drag handle is displayed (visible below "(1hr)" in the previous image). Clicking and dragging the handle enables the user to increase or decrease the duration of the job in 30 minute increments.
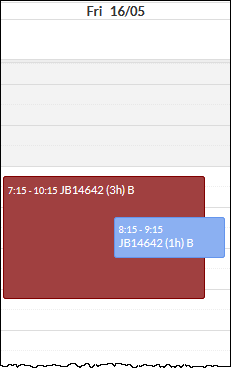
In Day and Week views, jobs that are booked in an overlapping period are displayed accordingly, as shown in the following image:
In Month and Week views in the calendar, a job can be dragged and dropped into a different day.
The legend at the bottom of the calendar view explains the various colour / border-markings that can be seen in the calendar:
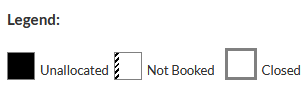
A colour code is also allocated to each technician (not visible in the previous image), and the technician's colour is applied as per the legend.
Settings
The Settings tab provides access to the following preferences:
- Job Types Selection
- Technician Selection
- Other Options (Show past unfinished jobs, Show more detail for each job)
For more information about Job Schedule features, please refer to the following Support Centre article:
Reports
Customers Report - Last or No contact between Enhancements
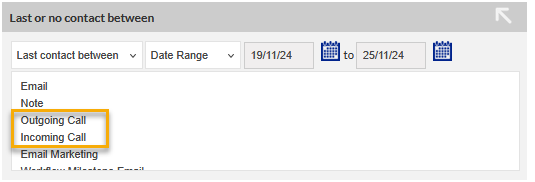
The Last or No contact between criterion, in the Customers report, now has Outgoing Call and Incoming Call as options (highlighted in the following image) for more refined reporting:
For more information about using standard reports and selecting criteria, please refer to the following Support Centre article: