What's New February 2021
Customer Portal
- Customer Portal Access MAJOR Update
- Customer Portal View (Settings) NEW
- Customer Portal New Design and Features MAJOR Update
Customers Module
- Customer Special Comments - Updated presentation Update
- Customers Screen - Additional Columns and Filtering Criterion Update
Reports Module
Projects Module
Workflows Module
General
- Home Screen / Dashboard
- Text Field Focus
- CommTrak Warning Messages
Customer Portal Access
There is an important upgrade to the security processes for the Customer Portal.
This update will have no impact on current customers with access to the Portal.
Key Points
Features
By default, only users with the role of a Supervisor have access to assign a Customer to the portal.
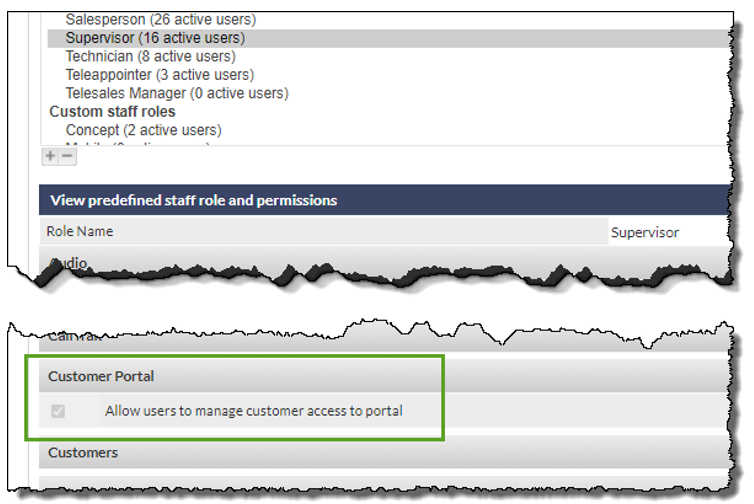
If you wish to allow other CommTrak users to manage access to the Customer Portal, you can create Custom Roles, as described in the Support Centre article, FAQ - Change User Permissions.
Providing Contact Access to the Customer Portal
The process for providing Contact access to the portal is documented in the Support Centre article, Customer Portal Access.
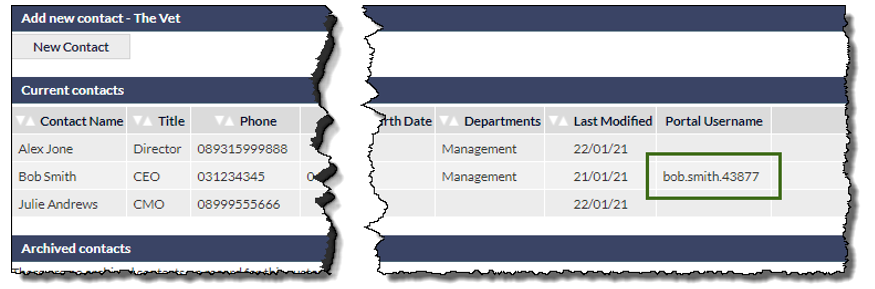
When a contact has been provided with Portal access, their Portal username is shown on the contact screen.
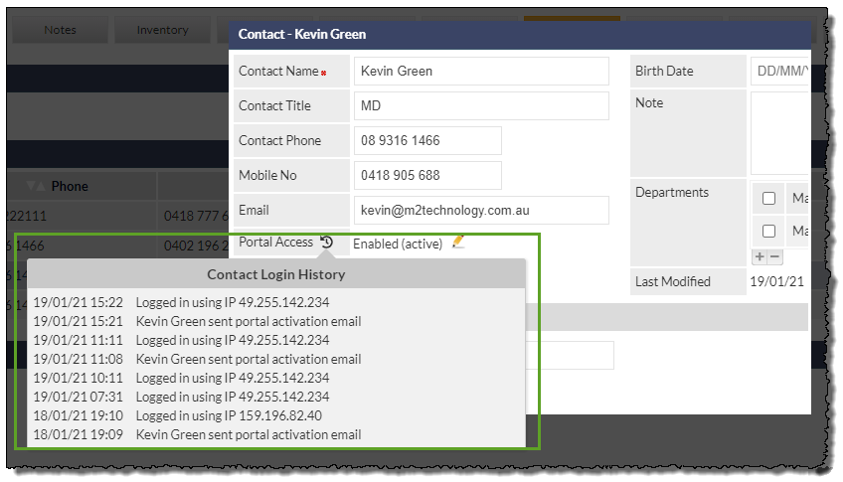
Monitoring Contact Access to the Customer Portal
You can review Contact access to the Customer Portal by opening their contact record, and hovering the mouse cursor over the history icon:
Customer Portal View (Settings)
A global setting enables you to determine which modules are viewable by your Contacts when logged-in to the Customer Portal.
Settings > Customer Settings > Portal Modules
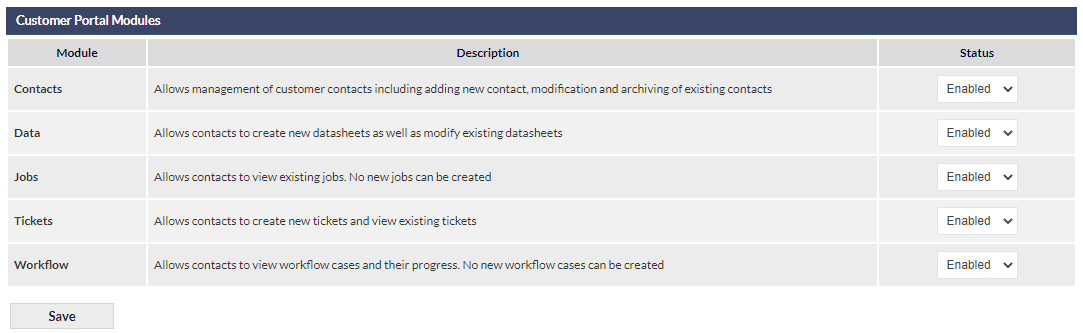
The above settings are effective for all Contacts, and affect the Contact's view of available modules within the Customer Portal, therefore all modules will be available in the Customer Portal:

The above image, taken from the Contact's Portal view, shows all the Portal modules available, as configured in the settings shown in the previous image.
Portal View Notes
- A Customer will only have access to Tickets that they originated
- A Customer will not see any internal Notes
- A Customer will only have access to data sheets if you assigned the template in the Manage Portal Templates section within the Data tab against that customer
Customer Experience
When activated within CommTrak, the Contact will receive a Portal Activation email, which will prompt them throughout the process of assigning a password and logging into the Customer Portal.
The completed Contact experience is documented in the Support Centre article, Customer Portal - Contact Login Experience.
Customer Portal New Design and Features
The Customer Portal has received a significant design update, and some new features:
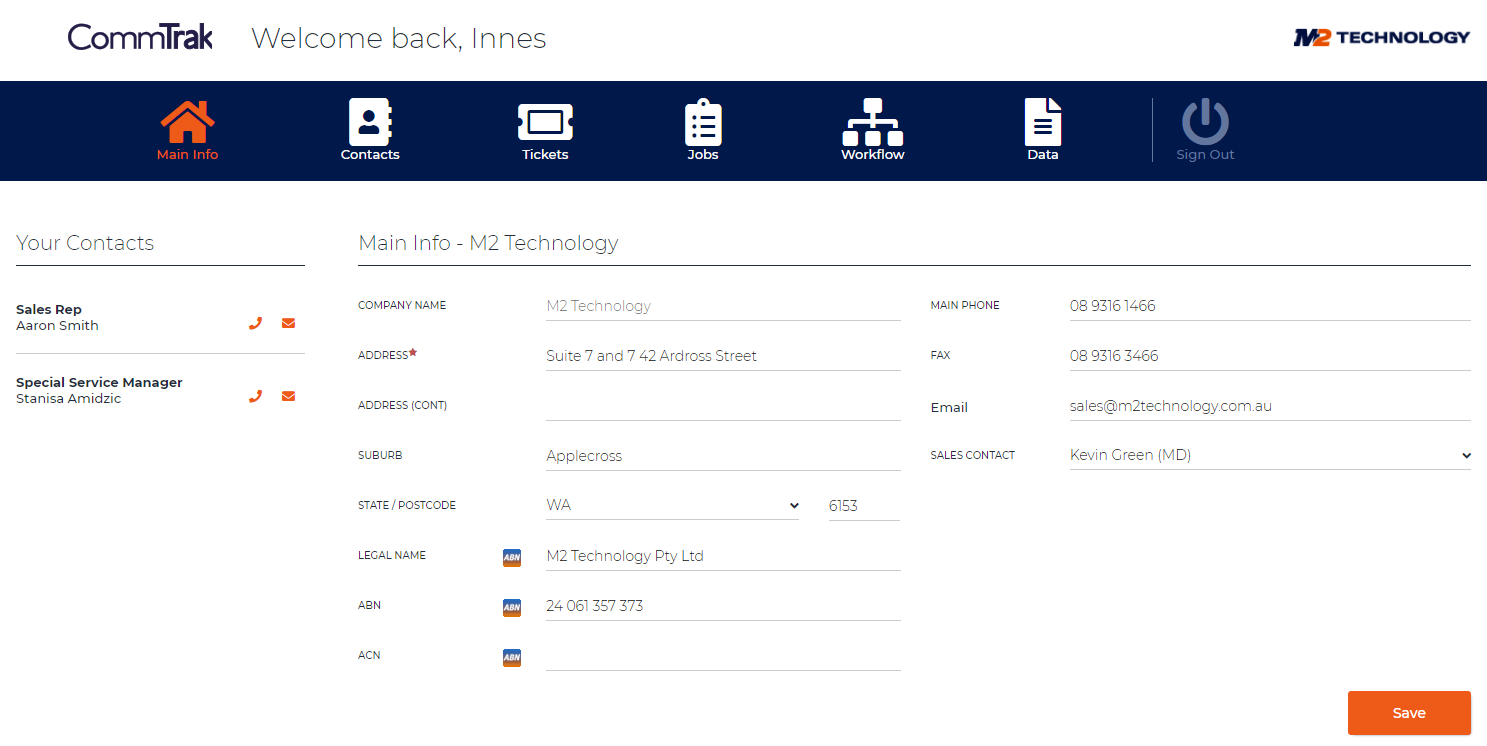
Main Info Screen
In the Your Contacts section, hovering over the telephone or email icon displays the relevant information:
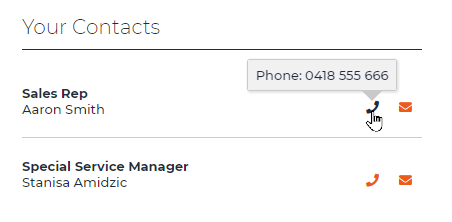
Only the mobile number for the Sales Rep is displayed (if available). All other Relationship Managers (e.g. Special Service Manager in the above image) display the main company phone number.
Email address is shown for all contacts. Clicking the email icon opens a new email message, populated with the recipient's email address.
Customer Portal Tickets
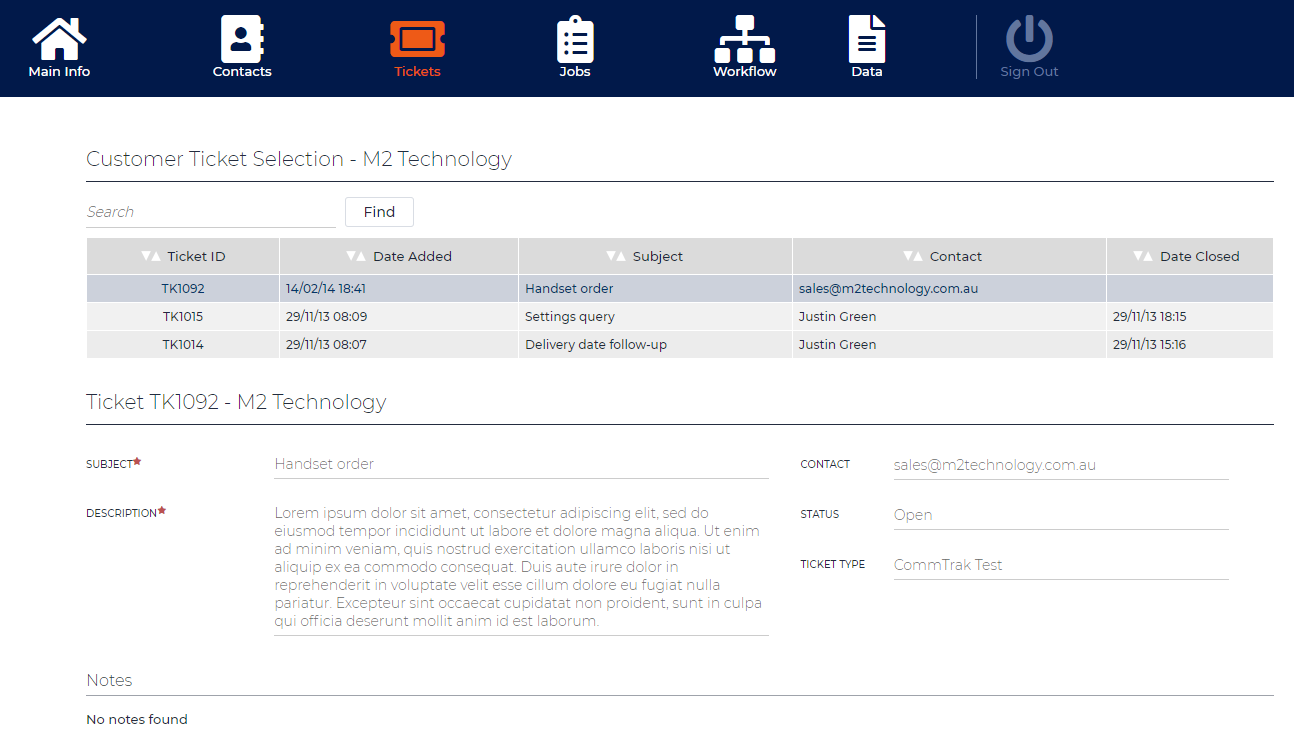
A Contact will never see an internal Ticket Note; they will only see notes that they have added or which have been sent to them via Ticket email.
Customer Portal Workflows
Below, is an example of a Workflow summary in the Customer Portal:
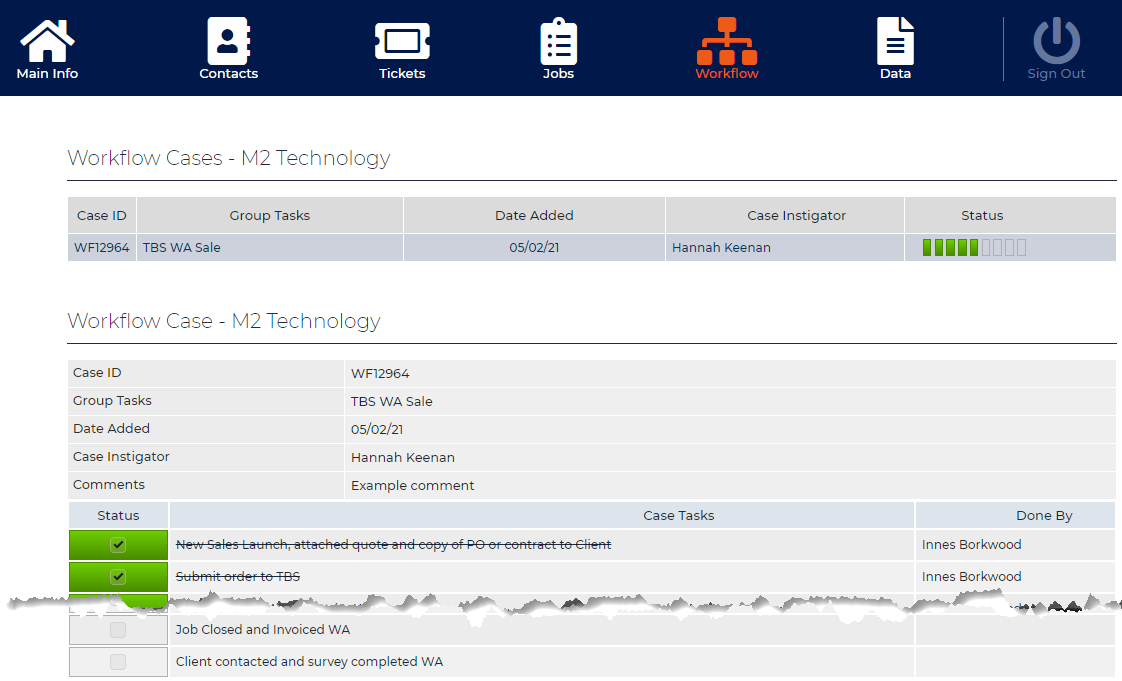
A Contact can only view the summary of each Active Workflow, as shown in the above image; they cannot make any modifications to the Workflow.
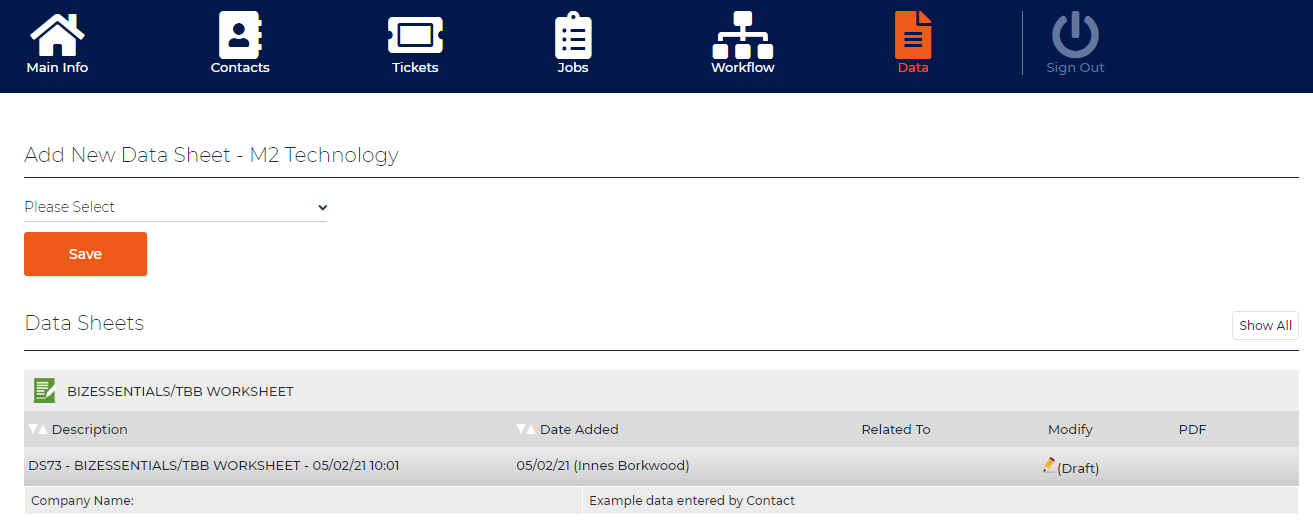
Customer Portal Data Sheets
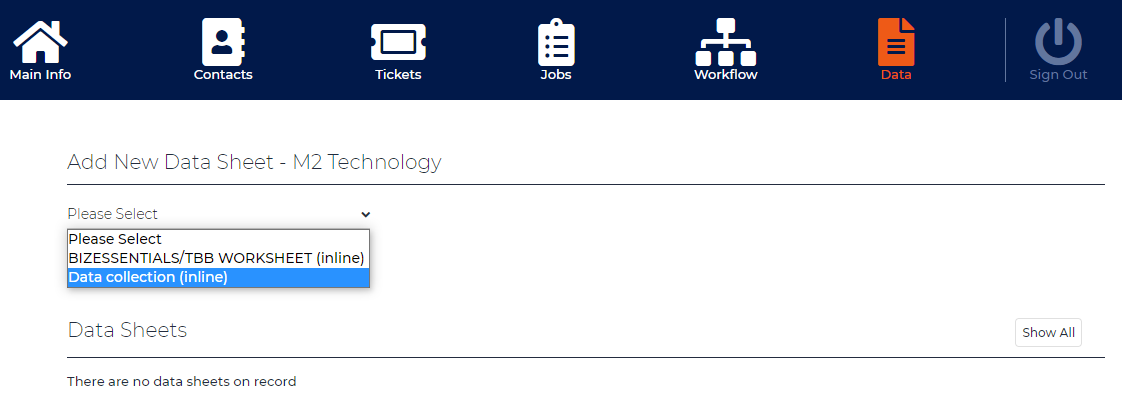
Contacts can add, edit and submit Data Sheets from within the Portal.
A Contact can only create Data Sheets that have been configured for Portal access:
Configuring Data Sheets for Portal Access
Customer's Screen > Data > Manage Portal Templates
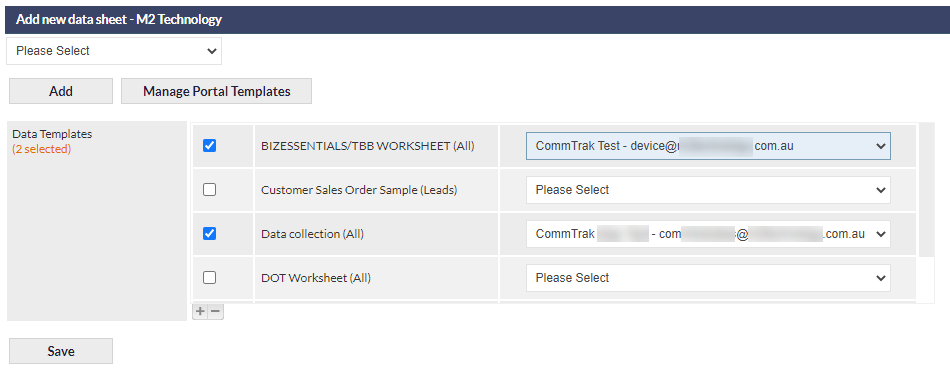
Select the Data Templates that should be visible to the Contact, and also specify a Tickets-From-Email address (this is mandatory). When the Contact updates a Data Sheet in the Portal, a Ticket will be created, thus notifying staff that a Data Sheet requires action.
In the above image, two Data Templates have been selected for this Customer.
Portal View of Data Sheets
When Data Templates have been allocated for access within the Customer Portal, the contact will be able to create, edit and submit the Data Sheets:
Once selected, the Contact can complete (or partially complete) the Data Sheet, and can either Save or Submit it:
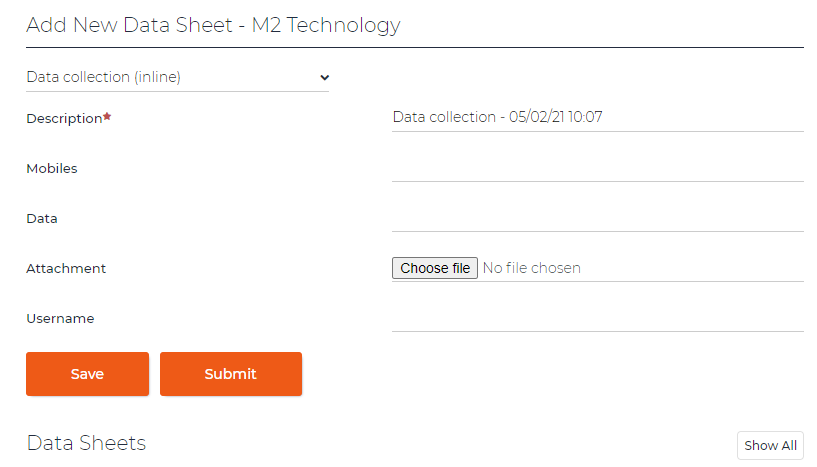
Once submitted, a Ticket is generated against the Customer record, and the Contact can no-longer edit the Data Sheet.
If Saved, the Contact can edit the Data Sheet at any time, for later submission:
Customers Module
There are several updates to the Customers Module:
Customer Special Comments
The Special Comments display has had a face-lift:
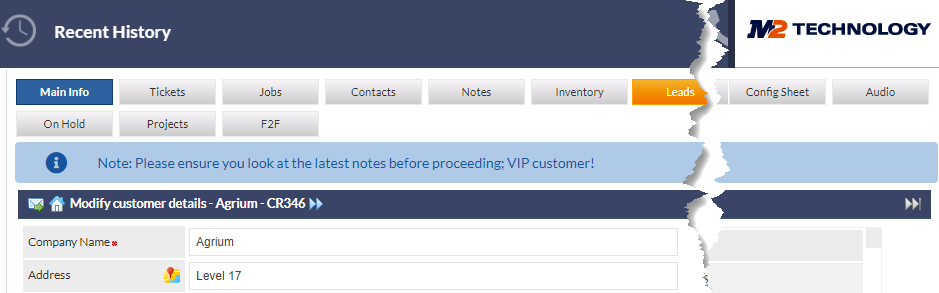
Customers Screen Columns
The Customers Screen now contains additional columns and an additional search criterion:
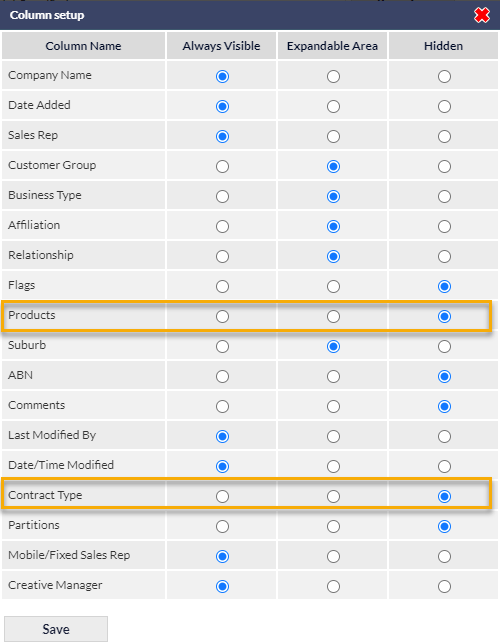
Additional Columns
The Customer Screen can now display the following columns:
- Products
- Contract Types
To modify the columns visible on the Customers Screen, see Support Centre article, Column Sorting & Customisation.
Additional Customers Filtering Criterion
Corresponding to the new Contract Type column in the Customer list, the Customer Search (filtering) section has been expanded to search for Contract Type:
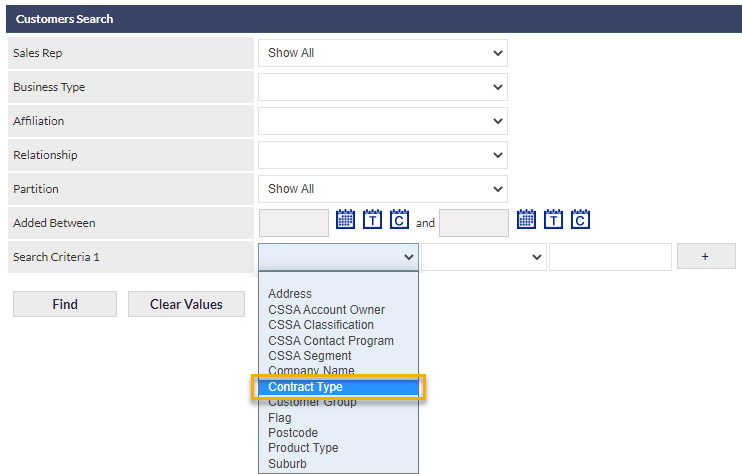

The result may appear as shown below:

Reports Module
Customers Report Additional Columns
Additional columns have been added to the Customers Report when either contract criteria are selected:
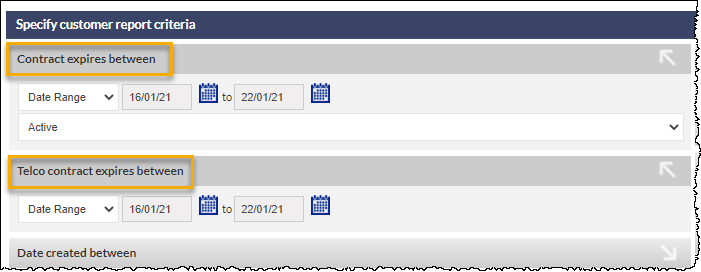
The additional columns displayed are:
- Contract Start
- Contract Duration
The above columns are in addition to Contract Expiry, which is already displayed in this report.
Customer Groups
The following reports have been enhanced to allow for Customer Groups to be included as searchable and reportable:
- Data Sheets Report
- Jobs Report
- Leads Report
- POS Report
- Project Report
- Quotes Report
- Tickets Report
- Workflow Report
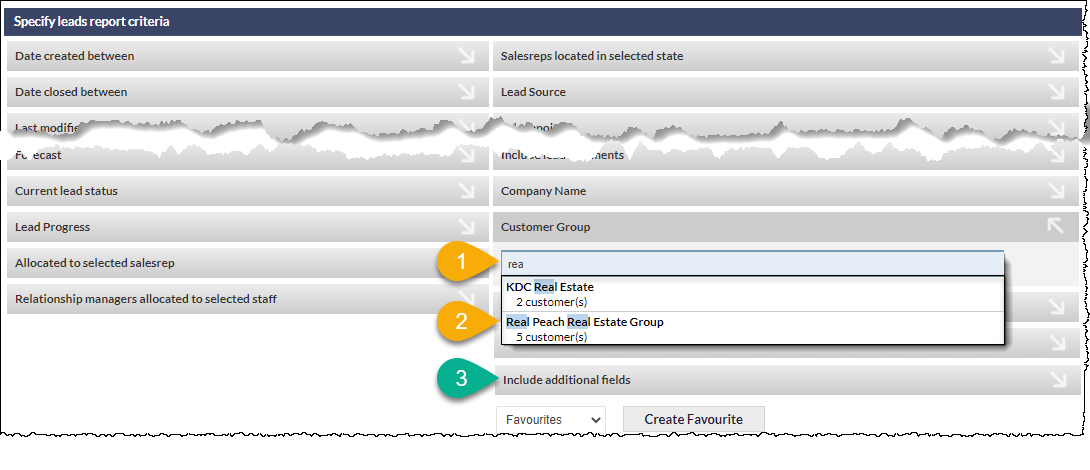
- Enter a minimum of three characters to start the Customer Group search
- Matching results are displayed in a drop-down list (the number of customers in the group is displayed)
- Optionally, select fields in the Include Additional Fields criterion (available fields vary, depending upon the report selected)
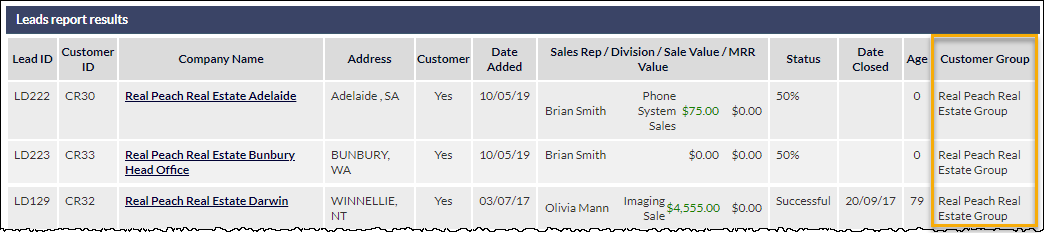
The report results include the Customer Group column:
Projects Module
Projects Past Due Date are Highlighted
On the Active Projects page, if a Project's Due Date has passed, the background of the Project row will be highlighted red:

Summary:
- The default Progress bar background is blue (shown in above image)
- If the Project is overdue, the project row bar background is red (shown in above image)
- If a Project Task is due today, the right-hand side of the Progress bar is displayed in yellow (not shown in this article).
- If a Project has overdue Tasks, the Progress bar is displayed in red (seen in examples below)
Additional examples:
In the following image:
- Project PR2 is overdue (row has red background), and there are overdue Tasks (red progress bar)
- Project PR3 is not overdue, but there are overdue Tasks (red progress bar)

For additional updates relating to the Projects module, see the section, Projects Summary Panel Added.
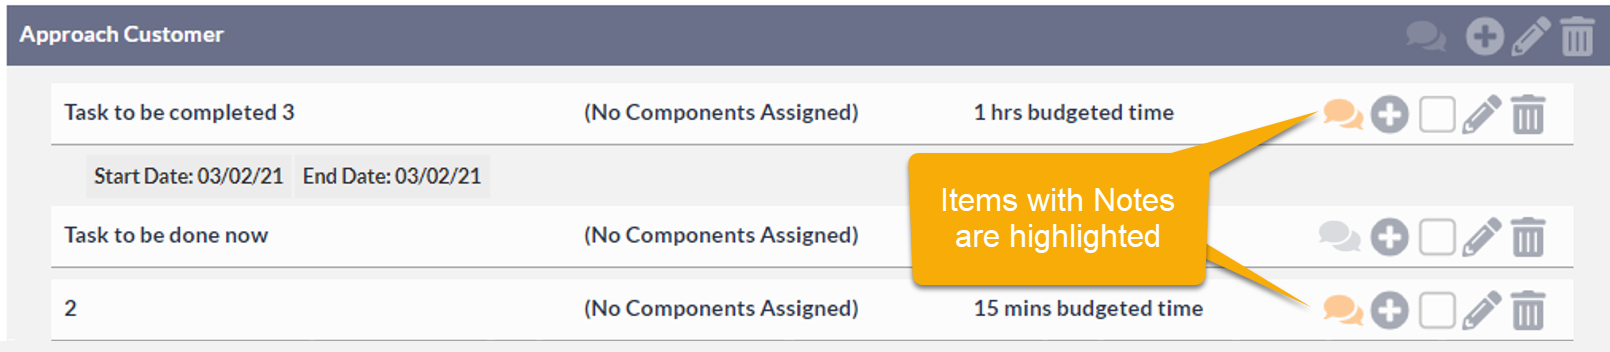
Project Notes Highlighted
To improve discoverability of notes, when a note has been added to a Task or Milestone, the note icon is now highlighted:
Workflow Module
Action Buttons buttons are pinned
The Save, Cancel and Delete buttons are now pinned to the bottom of the Workflow Case screen. This ensures that the buttons are always available without having to scroll to the bottom of the screen:

Note: Cancel and Delete buttons are permission-based, and will not be visible to all users.
General
Home Screen / Dashboard
Projects Summary Panel Added
A Projects Summary Panel has been added to the Dashboard, summarising Projects for which you are the Project Manager:
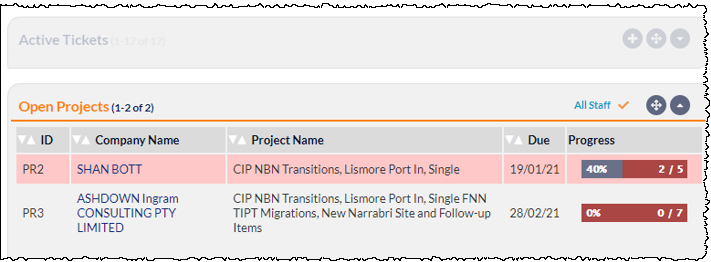
- Red progress bar (in the Progress column in the image above) indicates overdue Tasks in the Project
- Red highlighted row indicates that the Project is overdue (as shown for PR2 in the image above)
- If permissions allow, the All Staff link will be displayed towards the top-right of the panel. When activated, a tick will be displayed as shown in the image above, and all active Projects will be summarised.
For additional information relating to use and customisation of Summary Panels, please see the Support Centre article, Summary Panels.
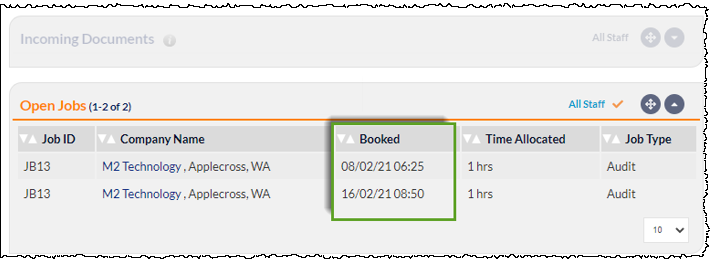
Booked Date/Time column Added to Job Summary Panel
The date and time of Booked Jobs is now displayed in the Jobs Summary Panel, complementing the information available in the Jobs module:
For additional information relating to use and customisation of Summary Panels, please see the Support Centre article, Summary Panels.
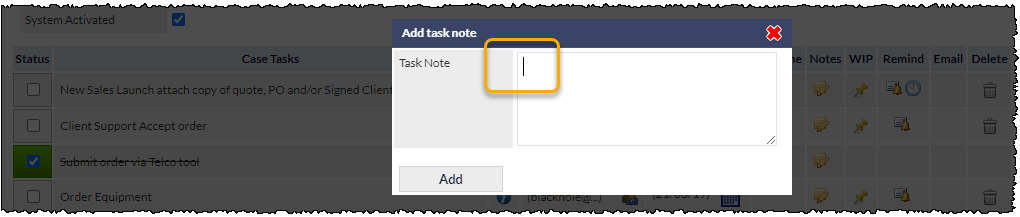
Text Field Focus
Where appropriate, CommTrak now automatically focuses the cursor into the default text field when a screen or pop-up window is displayed.
For example, when adding a Task Note to a Workflow, the cursor appears in the note field automatically, so you can start typing immediately, without first having to click the field:
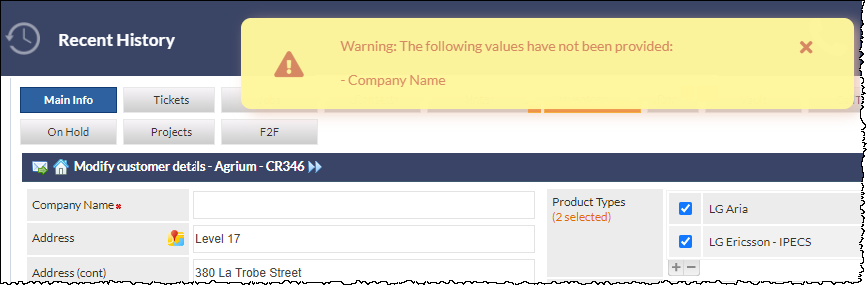
CommTrak Warning Messages
Warning messages have a new look and, importantly, are displayed at the top of the visible screen, rather than at the top of the page: