
New Ticket (Create a Ticket)
The New Ticket option is available in two locations:
- Active Tickets screen
- Customer Tickets screen
When the New Ticket button is pressed, the following fields are presented:
Subject (mandatory)
The subject of the Ticket; this should be a brief description of the issue.
Description (mandatory)
This is a text-area into which a detailed description of the Ticket can be entered.
SLA Info
A Service Level Agreement can be specified for the Ticket.
Priority
Select the priority of the Ticket from the drop-down list. The options are:
- Critical
- High
- Normal
- Low
The default priority is Normal.
Ticket Type
The type of incident for which this Ticket is being created should be selected from the drop-down list.
The Ticket Type can be refined by selecting a Subtype (if available) from below the main Ticket Type in the drop-down list.
For configuration, see Support Centre article Ticket Types (Settings).
Department / Staff
The CommTrak user or Department to which this Ticket should be allocated.
Either an individual CommTrak user or a Ticket Department can be selected from this drop-down list. If a Department is selected, Ticket notifications (if any) will be sent to all Department members as listed under the name of the Department in the drop-down list.
For configuration, see Support Centre article Ticket Department (Settings).
Customer Name
The name of the Customer.
This field is a company name search; enter a minimum of three consecutive characters from the company name to display a list of matching records, then select any one of the results.
If the Ticket is being added from the Customer's Tickets tab (rather than from the Active Tickets list), the Customer Name field is populated automatically and cannot be edited.
Email Account (mandatory)
Select the email configuration with which this Ticket should be associated. The selected configuration will determine the email account that will be used for Ticket notifications to the Customer, and for receiving subsequent Customer email responses for the Ticket.
Your organisation's CommTrak Administrator should refer to the Tickets-From-Emails (Settings) and Tickets Miscellaneous (Settings) articles for more information relating to the Tickets module email configuration.
Email Customer
If ticked, the Customer will receive a Ticket notification email when the Ticket is created.
The default selection for this field can be modified in Ticket Miscellaneous (Settings).
The Email Customer field is only displayed here when a Ticket is first being created. Once the Ticket has been saved, this field is moved to the More Info section, and is disabled, as selection is only relevant at the time the Ticket is created.
Contact (mandatory if a Customer Name has been specified, otherwise this field is not visible)
The name of the Customer contact for this Ticket; the following options are available in the drop-down list:
- Add new contact
- Customer Email (selects the email address from the Customer's Main Info screen).
- Customer Contacts (lists the name and email address of all the Customer's contacts).
If the Add new contact option is selected, a pop-up window is displayed, enabling the user to enter the contact's details. Please see Customer Contacts for further information relating to adding Contacts.
Temp Heading
This is temporary
Deadline
Specify a deadline time and date for the Ticket if required.
When a Ticket deadline has been breached, the Ticket details will appear in red text in the Active Tickets list.
Staff
Activity / Time Spent
Chargeable or non-chargeable time can be added to the new Ticket, only if a Customer Name has been specified.
More Info
Immediately below the fields listed above is a grey expandable bar with a downwards-pointing arrow.
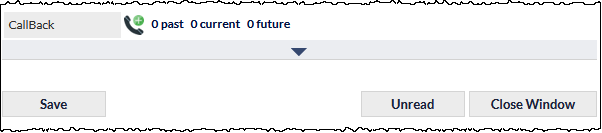
Pressing the grey bar displays the More Info section:

The fields displayed in the More Info section depend on whether a new ticket is being created or an existing ticket is being modified.
For detailed information about the fields in this section, please refer to the Ticket - More Info article.
Custom Fields
If Custom Fields have been created for Tickets, the Custom Fields section is displayed below the main fields.
Custom Fields vary (or may not exist), depending on the configuration of your CommTrak.
If Custom Fields exist, the section can be collapsed and expanded by pressing the arrow icon (rightmost on the Custom Fields section header):

Action Buttons
Add - Add the new Ticket
Cancel - All fields are cleared, and the user is immediately returned to the previous screen.