
Telesales Opportunity - New Opportunity
Larger images in this article can be clicked to display a full-size version.
When creating an opportunity, the most common steps are:
- Create the New Opportunity
- Start the Call
- Add a Call Note
- End the Call
- Add an Appointment
- Set a Follow-Up Call
- Specify the Call Outcome
- Save the Opportunity
Create the New Opportunity
If you are working from an existing Telesales Opportunity list, you will not need to create new opportunities, so you can skip this section and jump to Start the Call.
Telesales Opportunities can be created by pressing the New Opportunity button on the Telesales screen.
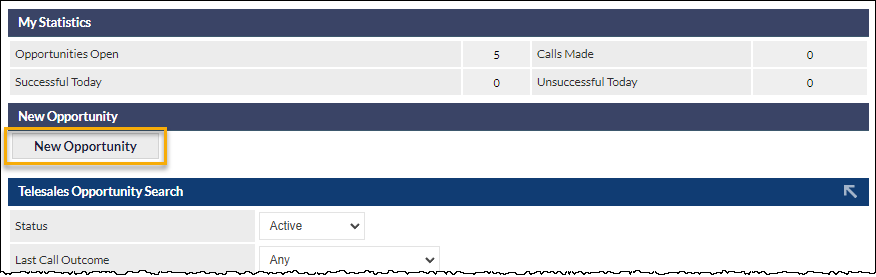
The New Opportunity screen is presented:

Complete fields as required.
Mandatory fields are:
- Company Name
- State (this will automatically be populated with your state as specified in your User Preferences)
- Main Phone
When entering the Company Name, CommTrak will check to see if there is an existing company with the same name:
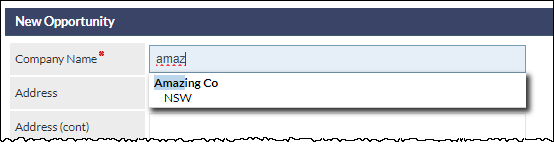
In the previous image, an existing company with the same name has been found.
Selecting an existing company from the list will prompt you to create a new opportunity for the existing company, or cancel to create an opportunity for a new company with the same name.
In an upcoming CommTrak release, the Teleappointer field will automatically populate with the current user's name (if the current user can be assigned Telesales Opportunities).
Press to continue, or press to return to the previous screen without saving the opportunity.
For this example, we entered a new Company Name, with a Main Phone number, and pressed the Add button, which created the new Telesales Opportunity shown in the following image:
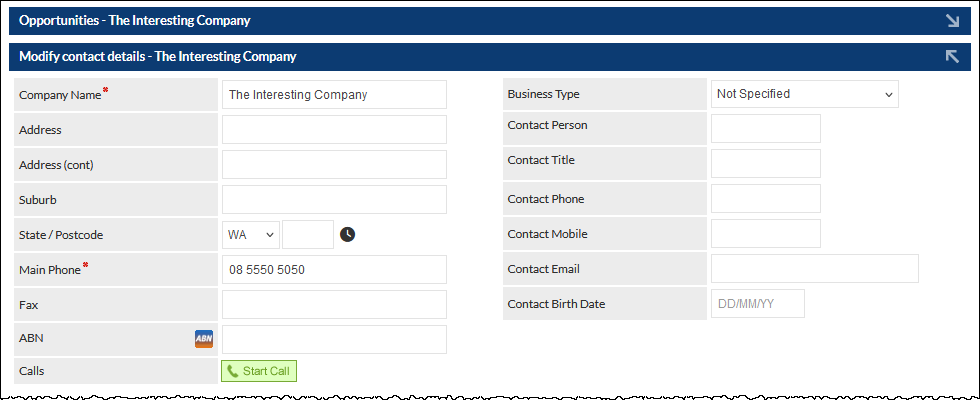
Start the Call
Press the Start Call button (visible in the previous image):

When pressed, the call timer is started and the call can be cancelled or ended (or you can continue the call):

Cancel Call - The call is ended, and there is no record of the call Start Call button having been pressed. Use this button if you started the call accidentally.
End Call - Press this button when the call has been completed.
During the Call
There are several possible outcomes of a call, but typically a conversation will occur:
When speaking to the contact, complete as many fields as required (e.g. Contact Person, Contact Title, Contact Email, etc).
Add a Call Note
Call Note - this is the main area to enter information about the call.

The Call Note field is only displayed after the call has started.
End the Call
In all cases, the call must be ended, as each Teleappointer can only have one call in progress.
Press the End Call button (visible in the previous image):

The call timer will stop.
Create an Appointment
An appointment can be created during a call, or after the call has ended.
Press the Plus icon in the Appointment field (visible in the following image):

A new browser tab will open in the current browser window:
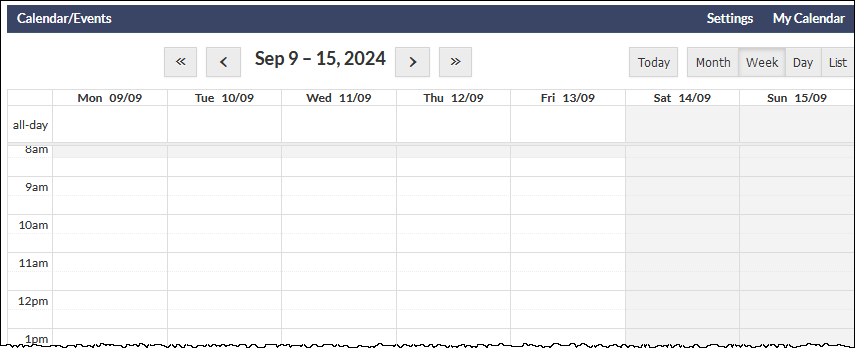
The date can be changed by using the navigation buttons at the top of the calendar:
<< and >> navigate by one year
< and > navigate by one week
You can also change the calendar view (e.g. Month, Week, etc), by pressing the buttons at the top right of the calendar (visible in the previous image).
Who is the Appointment For?
Unless you select another name, the appointment will be added to your calendar. To add an appointment for another person, Click the My Calendar link at the top-right of the calendar (visible in the previous image). Select the name of the person for whom you are making the appointment:
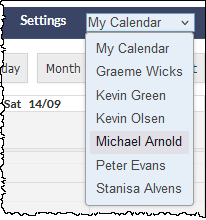
When you select a name, that person's calendar will be displayed.
Add the Appointment
Click on any date and time within the calendar, to add the appointment. The Add new event window is displayed:
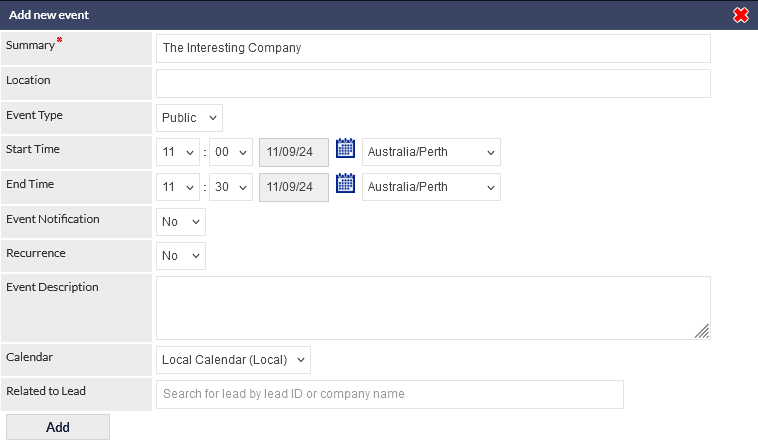
If required, add Location and an Event Description. Note that the calendar entry will contain a link to the opportunity details, so it is only necessary to add information that is not already included in the opportunity.
Press the Add button to save the appointment:
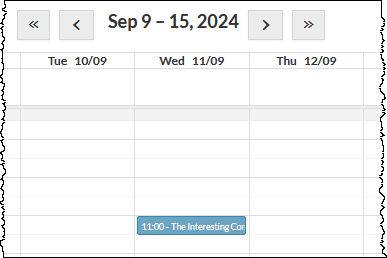
If required, the appointment can be edited in the calendar by clicking the item (shown in sky-blue in the previous image).
Once the appointment has been added, the calendar tab in the browser should be closed.
Follow-Up Calls
The Follow-Up field can be updated during a call, or after the call has ended.
If the telesales call requires a follow-up call (other than the actual appointment), enter a date into the Follow-Up field.
Follow-ups are typically required when a call is made, and the contact has asked to be called back at a later date/time.
Use the calendar icons to set a follow-up date, and enter a time using the drop-down options (visible in the following image):

When the follow-up date is reached, the opportunity will be displayed in the Telesale Opportunities with Follow-Up reached section of the Telesales screen.
Specify the Call Outcome
The Call Outcome can be updated during a call, or after the call has ended, but not after the opportunity call has been ended and saved.
Before an opportunity can be completed, the Call Outcome must be specified:
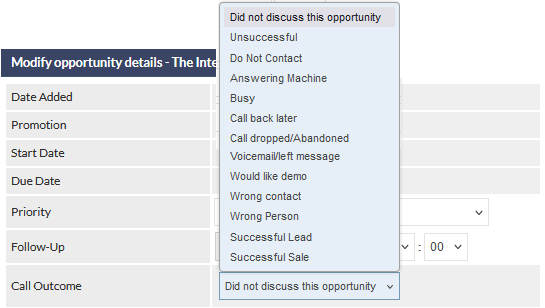
The options in your Call Outcome list may be different to those shown in the previous image. Your organisation's CommTrak administrator can customise this list, so please let them know if you need options adding or removing.
The most-commonly used options are:
- Unsuccessful - contact was not interested
- Call back later - contact requested a call at a later time
- Successful - CommTrak Lead will be created (and typically an appointment was made)
- Do Not Contact - contact has requested that they should not be called again
IMPORTANT: When the Call Outcome is set to Successful, you must specify the correct Sales Rep, so the Lead is allocated correctly.
Leads are created automatically when the opportunity is saved after setting the Call Outcome to Successful.
Save the Opportunity
Once the above steps have been completed, the opportunity must be saved.
Press the Save button at the bottom of the screen:

Two options will be presented:
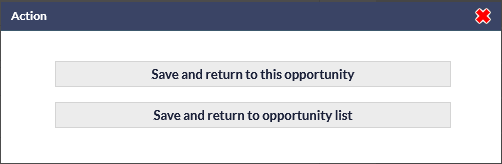
Save and return to this opportunity
All information entered into the opportunity will be saved, and you will remain on the current opportunity screen.
This option enables you to add more information to the opportunity after the call has been ended and the record has been saved.
For example, you can add more detail into the Call Note field, and add or modify an appointment.
Save and return to opportunity list
All information entered into the opportunity will be saved, and you will be returned to the main Telesales screen where you can review upcoming calls (e.g. Follow-Ups) or add a new opportunity.