
Quote Electronic Signatures Overview
This guide outlines the typical process for creating a quote with an electronic signature:
- Create the quote
- Send the quote to a contact for eSignature
- View interaction history, and access the signed document in CommTrak
- Change Lead status to successful
This is an overview of the electronic quote process. For more detailed information, please refer to the Quotes category in the CommTrak Support centre.
Creating a Quote
Navigate to the Lead
Click the customer's Leads tab and select the require Lead or create a new Lead (See Lead Screen article for creating a Lead).
Initiate New Quote
In the Lead, click the New Quote button:

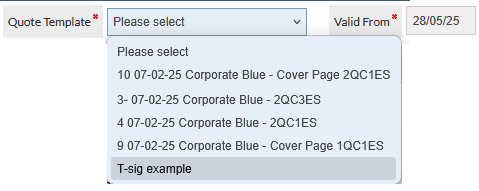
Select Quote Template:
From the Quote Template dropdown, select the required template:
Add Quote Items
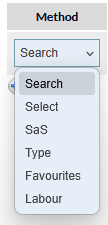
Use the Method dropdown to select the type of item that you want to add:
Complete the Buy Price, Sale Price, Qty (Quantity) fields:

Select the Business Division
If it is not already populated, select the business division for this item:

Division is a mandatory field as indicated by the red asterisk (visible in the previous image).
If the Save button is pressed when there are incomplete mandatory fields, the required fields are highlighted with a red border:

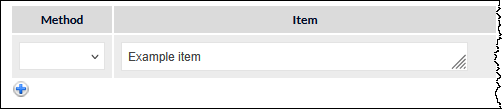
Add line items by pressing the plus icon located below the bottom-most line item:
Save the Quote
Once all items are added and details are correct, click the Save button at the bottom the New Quote screen.
Once the quote has been saved, additional buttons are displayed in the pinned area at the bottom of the screen:

Quote Body
Displays the quote body - if there are editable sections in the quote, edit as required and save when complete.
Preview
Opens a quote preview in a new browser window. The quote is displayed exactly as it will be presented to the customer.
Save
Saves any changes to the quote. If the quote has changed since the last time it was saved, the Save button is displayed with red text:

Go
The Go button carries out the action selected in the dropdown list:
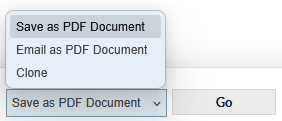
In the context of this walkthrough, this option will not typically be used, but you may wish to Save as PDF Document - this will generate a PDF of the current quote and attach it to the Related Documents field in the lead.
Advanced
Pressing the Advanced button displays the Advanced quote options pop-up window (detailed in the following section):
Sending the Quote to the Customer for eSignature
Advanced Quote Options
When the Advanced button is pressed, the Advanced quote options pop-up window is displayed:
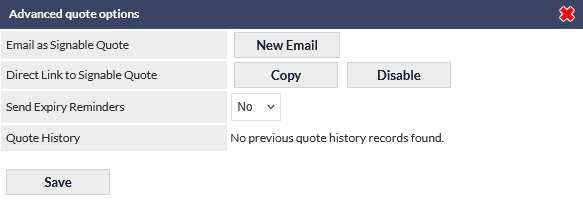
Email as Signable Quote
Press the New Email button to display the email window.
Key fields in this window are:
To - If a contact has been specified in the Lead, the contact will automatically be displayed in this field.
For more information about email fields, please refer to the Email section in the Notes & Emails article.
Subject - This field can be populated automatically, if the selected Template includes the subject information.
Template - Select the required email template. The selected template must include the Sign Document button. Once selected, press Refresh to load the template.
You can make minor edits to the email body here if needed, but the Sign Document button must not be modified or removed.
Send - Sends the email to the contact
Direct Link to Signable Quote
Generate - This option generates a link that can be sent to the contact instead of using the New Email option (for example, sending the link via Teams chat, or via external email client).
When the Generate button is pressed, two additional buttons are displayed:
Copy - copies the link to the device's clipboard - once copied, the link can be pasted into (e.g.) Outlook email.
Disable - prevents the link from being used
Send Expiry Reminders
If configured, automatic reminders can be sent to the contact.
Please refer to the article Quotes Automated Reminder Emails for more information about this feature.
Quote History
Quote history shows a record of when:
- Quote was sent to contact
- Customer viewed quote
- Customer signed quote
- Quote link was generated (using the Direct Link option)
- Quote link was disabled (using the Direct Link option)
Accessing the Signed Quote & Finalising the Lead
When a contact has signed a quote, two emails are sent to the Sales Rep to whom the lead is assigned:
- Confirmation that the quote has been signed (contains a direct link to the Lead)
- An email containing a PDF of the signed quote
View Signed Document in CommTrak
- Navigate to the Lead Info tab for the relevant lead in CommTrak
- In the Related and Upload Documents section the signed PDF is attached
Update Lead Status
The following steps are typically completed once a quote has been signed, but the process in your organisation may differ:
- Change the Lead Status to Successful
- In the Quotes Accepted field, tick the quote or quotes that have been accepted
- Select the relevant Workflow Case(s) from the dropdown
- Save the Lead to trigger the selected Workflow(s)