
Configuring MS 365 Aliases / Distribution Groups
This article is provided as a courtesy, to assist you in configuring MS365 email accounts and distribution groups to work with CommTrak Tickets-From-Email. Do not make any changes to an MS365 account unless you fully understand the ramifications of any changes that you make.
The screenshots and steps in this article are correct at the time of publishing, but represent the Microsoft 365 Administration console, which may change in the future.
This article explains how to configure Distribution Groups in Microsoft 365, in preparation for using them as Tickets-From-Email addresses.
Although aliases can be used for Tickets-From-Email, there is a known issue with Microsoft 365 aliases; using a 'normal' alias presents problems when emails are sent from inside the organisation (to another email address within the same organisation), namely, the loss of original destination (i.e, the alias email address is ignored, and the email is delivered to the ‘master’ email address). For this reason, we recommend using Distribution Groups for Ticket-From-Email addresses, as they maintain the original destination email address when emailing within an organisation.
Master Account
Before you can add an alias or distribution group, you must have a master email account to receive all the emails. All your CommTrak aliases will be created within the master account
Note: The master account must not be deleted, as it will remove all aliases. This account must be able to send and receive emails; if you are using Microsoft 365, this requires one “Exchange Online (Plan 1)” license dedicated to the master account, as a minimum.
Setting up the Master Account in Microsoft 365
The following steps will guide you through preparing your master account in Microsoft 365:
Visit https://admin.microsoft.com/ (you must be a Microsoft 365 administrator)
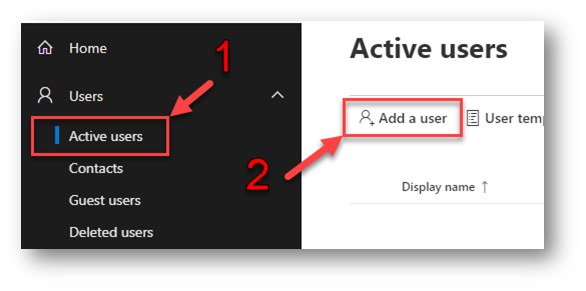
- Click on Active users
- Click on Add a user
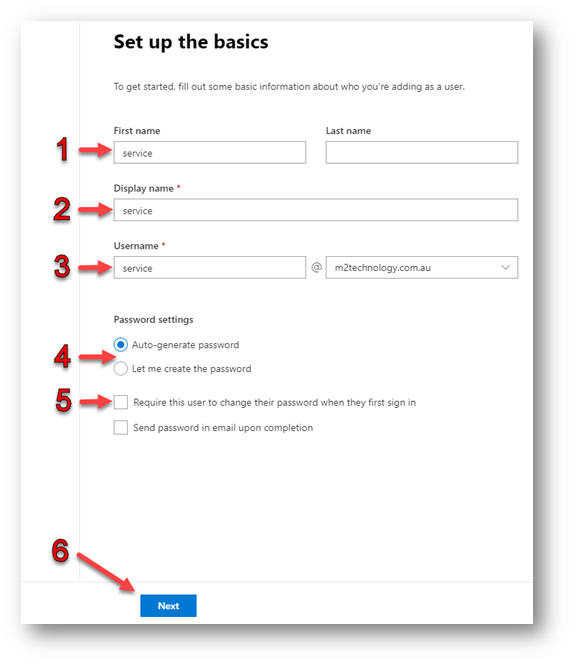
- Enter the name of your master account (example: Service or CommTrak)
- Enter the name of your account (similar to Step 1)
- Enter the username of your account (similar to Step 1)
- Choose a password; ensure to document it, as it will be required later
- Untick Require this user to change their password when they first sign in
- Press Next, to continue to the license selection
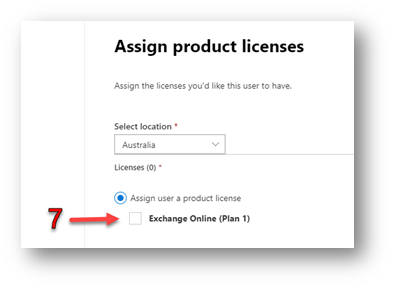
- Select a Microsoft 365 Email license for the account
- This license should allow the account to send and receive emails
- At the time of publication of this article, the minimum license required is Exchange Online (Plan 1)
Finish adding the account by pressing Next until it has been added.
Your IT Department must prevent the Master account password from expiring!
- If the Password Expires, CommTrak will be unable to check for emails.
- Until the password is reset, new emails will remain in the account's mailbox.
- Preventing password expiry can be done on a per-account basis; your IT Department should implement this.
Once the 'master' account has been added, aliases and distribution groups can be created...
Adding an Alias via a Distribution Group
As discussed above, it is recommended that Distribution Groups for allocating Ticket From Email addresses:
Visit https://admin.microsoft.com/ (you must be a Microsoft 365 administrator)
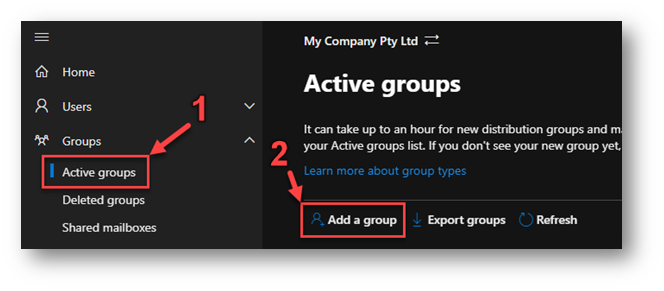
- Click Active Groups in the Groups dropdown.
- Click Add a group
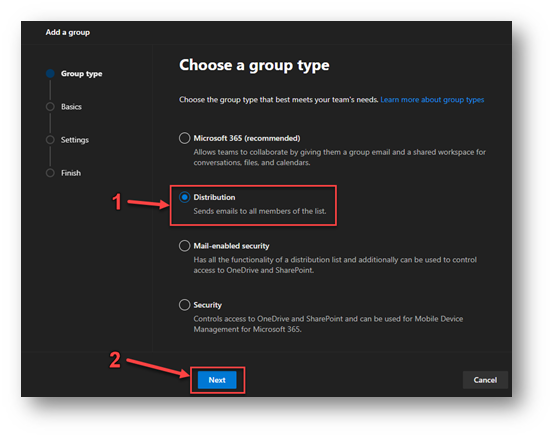
- Select Distribution as the group type
- Click Next
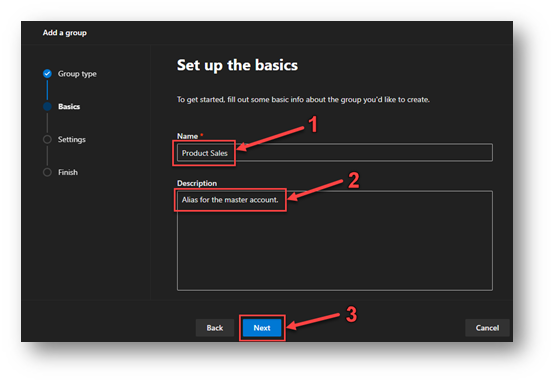
- Enter the Name of the alias (e.g. Product Sales)
- Enter a Description. It is advisable to note that this is a distribution group for the master Tickets From Email, account to avoid accidental deletion.
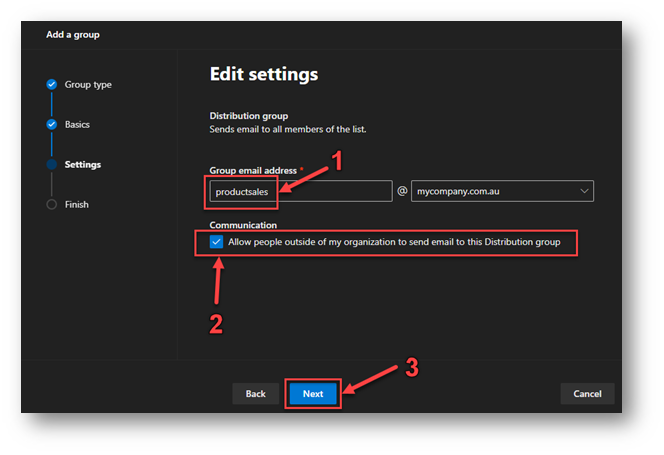
- Enter the email address to be used for receiving emails.
- Tick the Communication box
It is vital that the Communication field is ticked; if unticked, emails from outside your organisation will be rejected.
- Click Next
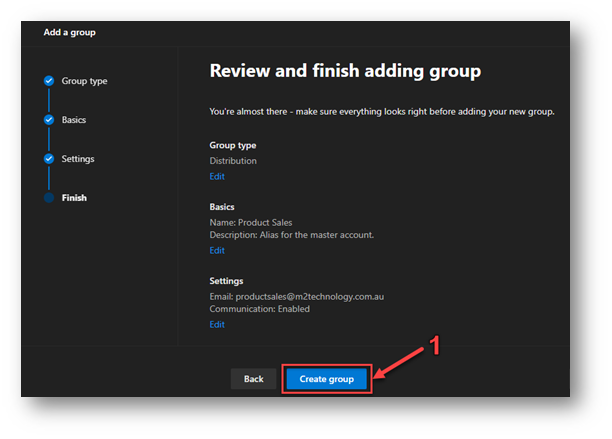
Confirm the settings and click Create group
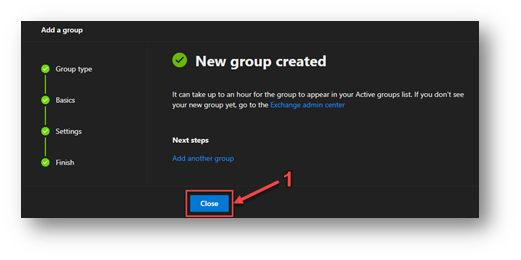
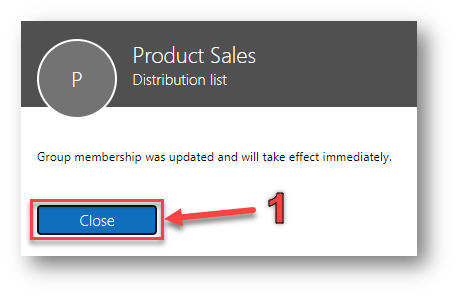
- Click Close
It can take up to 60 minutes for a new Distribution Group to become visible although, it typically takes only a few minutes.
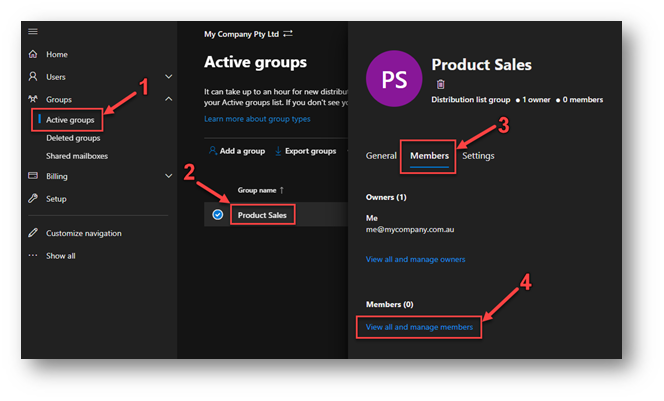
- Click Active Groups
- Select the recently created distribution group.
- In the pop-out window, click Members
- Click View all and manage members
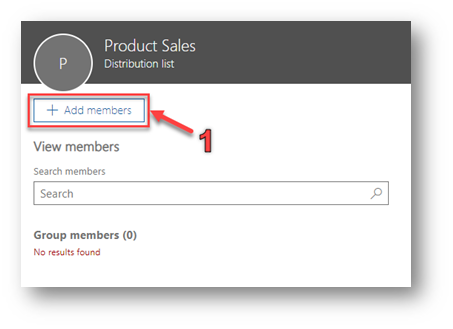
- Click Add members
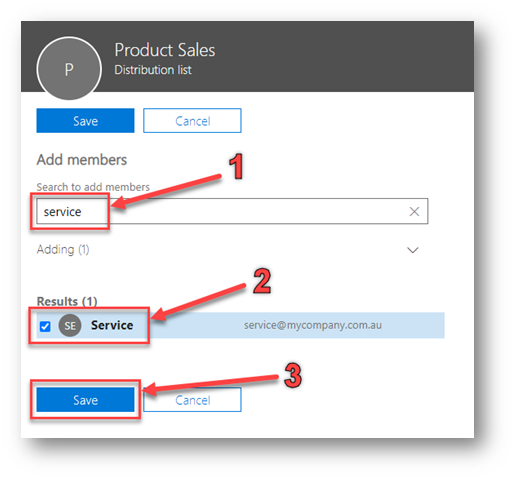
- Search for the master account that this distribution group will be added to.
- Select the master account; ensure its box is ticked.
- Press Save
The distribution group has been added, and is now ready to be selected in CommTrak as an alias.
Distribution groups can take up to 15 minutes to become visible in CommTrak.
For configuration of Tickets From Email aliases in CommTrak, see Support Centre article: Tickets From Emails (Settings)